
Learning how to clean and repaste a gaming laptop is one of the most effective ways to bring back lost cooling performance. Dust clogs the fins and fresh thermal paste restores heat transfer, so the CPU and GPU can hold their clock speeds again. The job takes patience more than skill, and most of the work is careful, organized disassembly.
Key Takeaways
- Dust removal and repasting solve two different problems, so doing both in one session gives the best results.
- Always power off, unplug, and disconnect the internal battery before touching anything inside the laptop.
- Remove every trace of old paste with 90 percent or higher isopropyl alcohol and a lint-free cloth, then apply a small amount of new paste.
- Never swap thermal pads for paste, and never use liquid metal unless the laptop is designed for it.
- Check temperatures and fan behavior after reassembly to confirm the job worked.
Before You Start
Opening a laptop can affect its warranty, so check the manufacturer’s terms first. If the laptop is still covered, or the design is heavily glued and soldered, it may be wiser to let a professional handle it. Searching for the exact model’s service manual or a teardown video also pays off, because screw locations and cable layouts vary a lot between models.
Tools and Materials
- A precision screwdriver set with the correct bit type for the laptop (often Phillips)
- Plastic pry tools or an old gift card for releasing clips and the bottom panel
- 90 percent or higher isopropyl alcohol
- Lint-free cloths or microfiber cloths, plus cotton swabs with minimal shedding
- A soft, dry brush
- Compressed air
- Fresh, non-conductive thermal paste
- A small tray or magnetic mat to sort screws
- An anti-static wrist strap (optional but helpful)
Safety Prep
- Shut the laptop down fully (not sleep mode) and unplug the charger and every accessory.
- Let the laptop cool completely if it was running recently, since the heatsink and fans can stay hot for a while.
- Work on a clean, flat, well-lit surface, away from carpet.
- Touch bare metal or wear an anti-static strap to discharge static before reaching inside.
- Never use water, household cleaners, or metal tools on the motherboard.
How to Clean and Repaste a Gaming Laptop Step by Step
- Step 1: Place the laptop upside down on a soft, clean surface. Remove all visible bottom screws and keep them in a tray, noting where each one came from. Screws often differ in length, and mixing them up can damage the board or chassis. Check under rubber feet or stickers for hidden screws.
- Step 2: Release the bottom panel gently with a plastic pry tool, working around the edges until the clips let go. Take it slowly, since forcing it can snap the clips or scratch the case.
- Step 3: Disconnect the internal battery connector from the motherboard. This is the single most important safety step, because it cuts power to the board while components are exposed. Pull the connector straight out by its plastic body, never by the wires.
- Step 4: Take a quick photo of the layout, then locate the fans, heat pipes, and heatsink. Unplug the fan cables and any other cables attached to the cooling assembly. Many of them use small latches that flip up before the cable slides out.
- Step 5: Loosen the heatsink screws. Most heatsinks are numbered, and the screws should be loosened in reverse numerical order, a little at a time, so the pressure releases evenly. Once free, lift the heatsink away gently. If it feels stuck, a very slight twisting motion can break the bond of old paste. Never pry it up with force.
- Step 6: Remove the fans if they are separate from the heatsink. Clean the fan blades and housing with a soft brush and short bursts of compressed air. Hold the fan blades still with a finger or a plastic tool while spraying, since letting them spin freely at high speed can harm the bearing.
- Step 7: Clear dust from the heatsink fins. Brush loose dust out first, then blow compressed air through the fins from the side the fan normally blows through, so debris is pushed out the way it came in. Packed lint can be lifted out carefully with tweezers or a plastic tool. Think of it like clearing a clogged radiator: the goal is open, straight channels for air.
- Step 8: Remove the old paste. Dampen a lint-free cloth or swab with isopropyl alcohol (never pour it on the board) and wipe the CPU, GPU, and the matching contact plates on the heatsink until they look clean and shiny. Let the alcohol evaporate fully before moving on.
- Step 9: Inspect the thermal pads. Pads are the soft, rubbery squares on memory chips and power components, and they are not meant to be replaced with paste. If a pad is torn, crumbling, or permanently crushed, replace it with a pad of the same thickness. Mismatched thickness leaves a gap that causes poor contact.
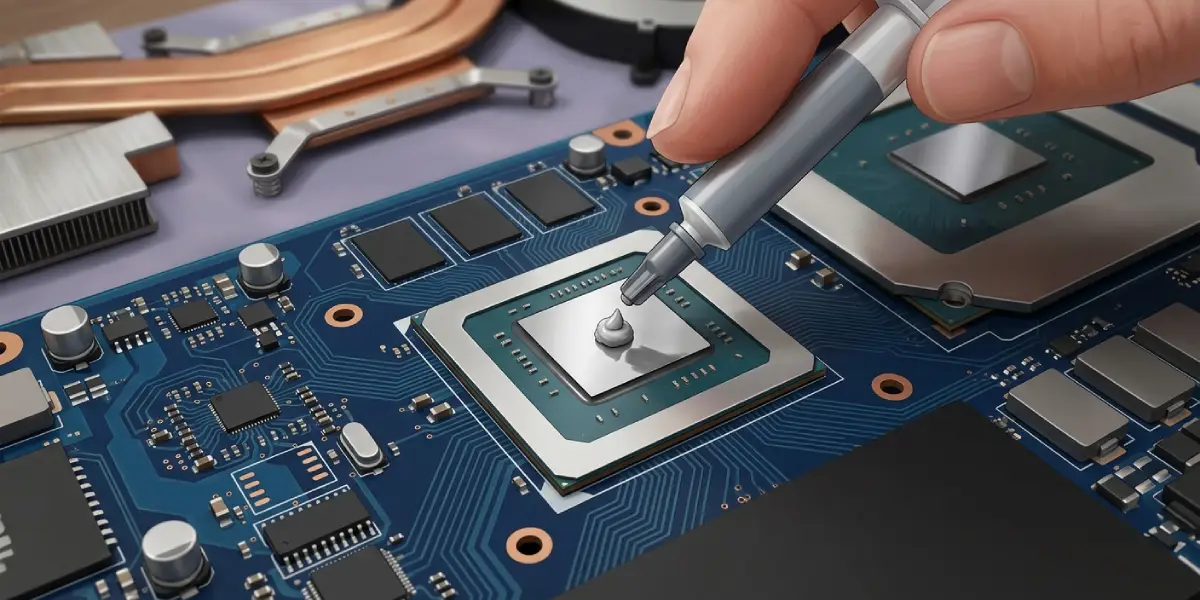
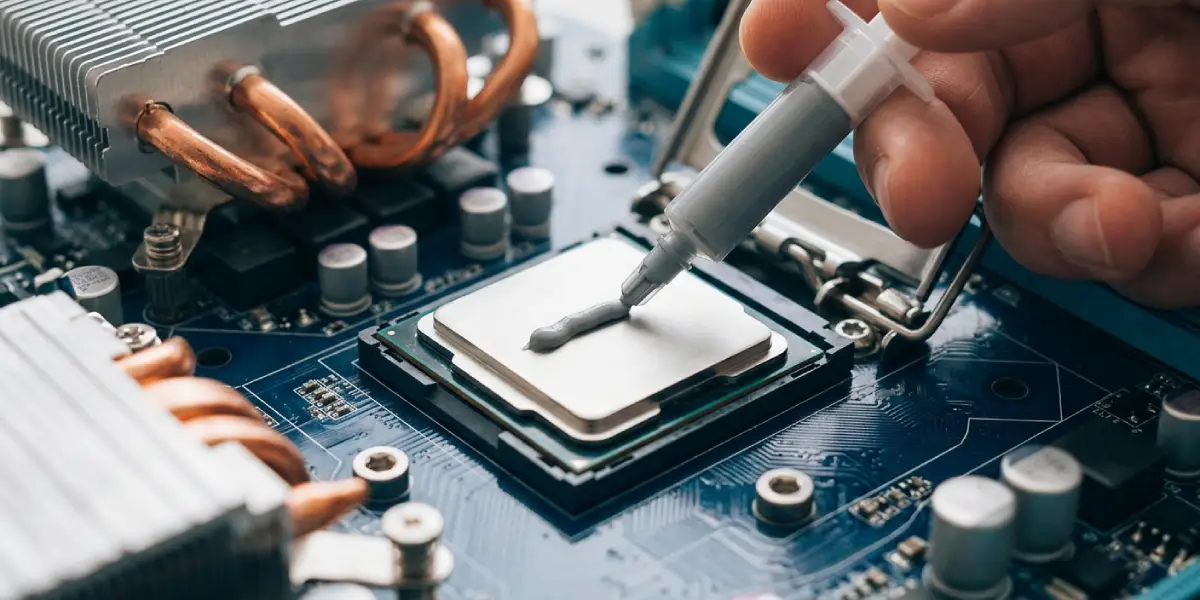
- Step 10: Apply fresh paste. Place a small dab or thin line in the center of the CPU and GPU. Less is more, because heatsink pressure spreads the paste on its own. Too much can squeeze out and make a mess around the chip.
- Step 11: Lower the heatsink straight down onto the chips, lining up the screw holes without sliding it sideways. Hand-tighten the screws in the numbered order (or a crisscross pattern if unnumbered), snugging each one a little at a time until all are firm. Do not overtighten.
- Step 12: Reconnect the fan cables and any other cables removed earlier, then reconnect the battery connector. Check that nothing is pinched or left loose.
- Step 13: Refit the bottom panel, press the clips in evenly, and put every screw back in its original spot. Power the laptop on and confirm that the fans spin and the system boots normally.
Tip: Take photos at every stage of disassembly. A quick phone shot of each layer saves a lot of guesswork when it is time to put everything back.
Choosing the Right Thermal Paste
For most people, a quality non-conductive paste (ceramic or carbon-based) is the safest choice. If a drop lands on a nearby component, it will not short anything out. Liquid metal compounds can deliver strong thermal transfer, but they conduct electricity, can stain or react with certain metals, and are not compatible with aluminum surfaces. They are best reserved for experienced users, or for laptops that come with them from the factory.
Tip: Avoid mixing and matching different pastes on the same chip, and always clean the old paste fully before applying anything new.
Checking That It Worked
After reassembly, install or open a hardware monitoring tool such as HWiNFO and compare CPU and GPU temperatures under the same workload as before the repaste. Lower temperatures, quieter fans, and steadier clock speeds during long gaming sessions are the signs of success. If a baseline reading was not taken beforehand, simply watch how the laptop behaves in a game that previously caused heavy fan noise or slowdowns.
Common Problems and Fixes
The Laptop Does Not Power On After Reassembly
Most often, the battery connector or a cable was left unplugged. Open the panel again, reseat the battery connector, and confirm the fan and any display or keyboard cables are firmly in place. Also check that no screw is missing or loose inside the case.
Temperatures Are Still High
Poor contact is the usual cause. Reopen the laptop, check that the heatsink screws were tightened evenly, and confirm no protective plastic film was left on a thermal pad or the heatsink plate. Also look for dust that was missed deep inside the fins.
The Fans Are Loud or Rattle After the Job
A fan cable may be loosely seated, a fan may not be sitting correctly in its housing, or a stray screw or piece of lint may be touching the blades. Reopen the case and check the fan seating and clearances.
The Laptop Shuts Down or Throttles Right After Repasting
This can happen if the heatsink was not mounted flat or a thermal pad is too thin or missing. Remove the heatsink and check the paste imprint. A thin, even spread on the chip suggests good contact, while bare patches point to uneven pressure.
Paste Squeezed Out Around the Chip
Too much paste was likely used. If it is non-conductive, carefully clean the excess with an alcohol-dampened swab. If liquid metal was used, stop and clean it immediately with great care, since it can short components.
Frequently Asked Questions
How often should a gaming laptop be repasted?
There is no fixed schedule. Many owners repaste every couple of years, or sooner when temperatures climb noticeably, fans run loud under normal loads, or the system throttles despite clean vents. Dust cleaning is usually needed more often than repasting.
Can a beginner repaste a gaming laptop at home?
Yes, with patience, the right tools, and the model’s service manual or a teardown video. Take photos during disassembly, keep screws organized, and stop if a step feels forced or unclear.
Will repasting void the warranty?
It can. Some manufacturers treat opening the case as a warranty issue, while others allow access to parts like fans and storage. Check the warranty terms before removing any screws.
What is the best thermal paste for a gaming laptop?
A quality non-conductive paste is the safest choice for most users. Liquid metal conducts electricity and is not compatible with aluminum surfaces, so it is best left to experienced users or laptops designed for it.
How much thermal paste should be used?
Less is more. A small dab or thin line in the center of the chip is usually enough, since heatsink pressure spreads it out. Too much can squeeze out around the chip and cause a mess.
Can compressed air alone fix overheating?
It helps when dust is the cause, but it cannot replace dried-out paste, and it may not reach packed lint deep in the fins. Opening the laptop gives a far more thorough clean.
Do thermal pads need to be replaced when repasting?
Not always. Pads on memory and power components should stay in place if they are intact. If a pad is torn, crushed, or oily, replace it with one of the same thickness rather than using paste.
Should the battery be disconnected before cleaning and repasting?
Yes. Unplug the charger, then disconnect the internal battery connector from the motherboard once the bottom panel is off. This cuts power to the board and reduces the risk of a short.
How can it be confirmed that the repaste worked?
Compare temperatures and fan behavior under the same workload before and after, using a hardware monitoring tool. Lower temperatures, quieter fans, and steadier clock speeds are the signs of success.
