
Learning how to disable audio enhancements in Windows 11 takes less than a minute and can clean up sound that seems muffled, tinny, or oddly processed. The steps work on every edition, including Home and Pro, and no administrator rights are needed. The exact options shown depend on the audio driver installed on the PC or laptop.
Key Takeaways
- The quickest route is Settings > System > Sound, then select the speakers or headphones and set Audio enhancements to Off.
- The classic Sound window offers a Disable all enhancements checkbox on the Enhancements tab when the driver supports it.
- Enhancements are set per device, so speakers, headphones, and HDMI displays each need their own change.
- No restart is required, and the change can be reversed at any time.
Step-by-Step Guide to Disable Audio Enhancements in Windows 11
Method 1: Use the Settings App
This is the easiest route for most people. Play some music or a video first, so the difference is easy to hear once the setting changes.
- Press Windows + I to open Settings.
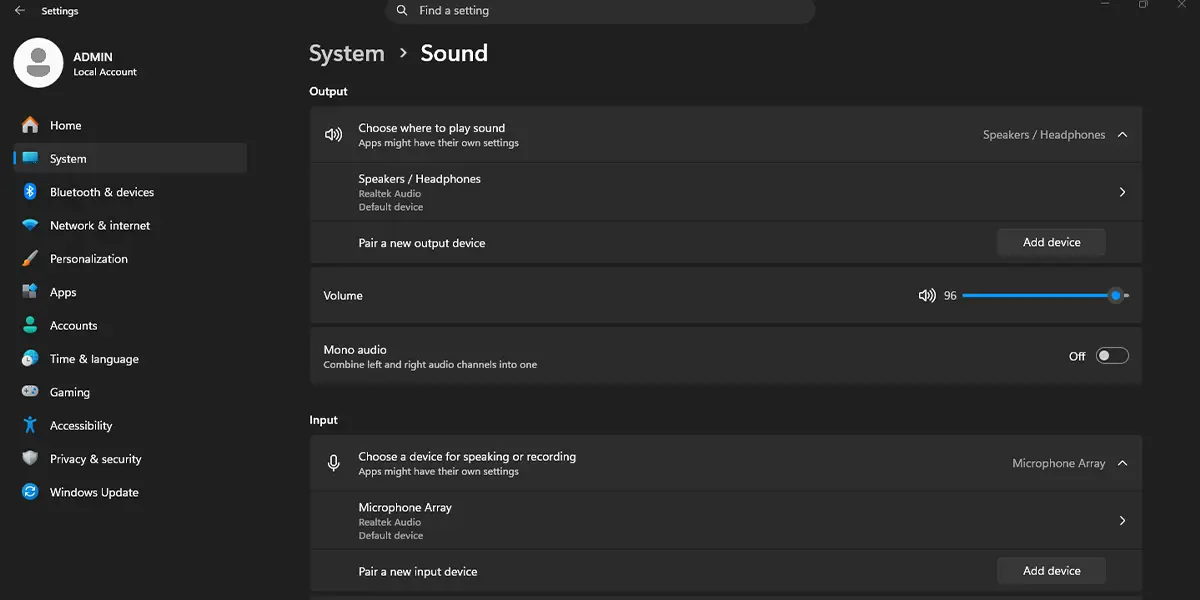
- Click System in the left sidebar, then click Sound.
- Under the Output section, click the speakers or headphones that are currently in use. The properties page for that device opens.
- Find the Audio enhancements setting and set it to Off.
- Play a song or video again. The sound is now the raw output of the device, usually a little flatter and quieter, with no bass boost or loudness effects added.
Tip: A laptop with built-in speakers and a pair of plugged-in headphones counts as two separate devices. Repeat these steps for each one if the sound should stay unprocessed everywhere.
Method 2: Use the Classic Sound Window
This older window still works in Windows 11 and is handy when the Settings page does not show an enhancements option for a device.
- Press Windows + I to open Settings, then go to System > Sound.
- Scroll down to the Advanced section and click More sound settings. The Sound window opens.
- Stay on the Playback tab, select the speakers or headphones in use, and click Properties.
- Open the Enhancements tab.
- Tick the Disable all enhancements checkbox.
- Click Apply, then click OK.
Tip: The Sound window can also be opened directly. Press Windows + R, type the command below, and press Enter. No elevated window is needed.
mmsys.cpl
How to Undo or Reverse This Change
To switch enhancements back on, return to Settings > System > Sound, select the same device, and set Audio enhancements back to its previous option. In the classic Sound window, open the device Properties, go to the Enhancements tab, and untick Disable all enhancements. Click Apply and then OK.
Common Problems and Fixes
The Audio enhancements option is missing or greyed out
The most common cause is the audio driver. A generic driver may not expose enhancement controls, while the manufacturer’s driver usually does. Installing the latest audio driver from the PC or laptop maker through Windows Update often brings the option back. On a work or school PC, an administrator may also have locked the setting, in which case the IT department is the one to ask.
The Enhancements tab is missing in the Sound window
Some drivers hide that tab. Open the Advanced tab in the same Properties window instead and look for an Enable audio enhancements checkbox. Untick it, then click Apply and OK.
The setting turns back on after a restart or driver update
A driver update can reset audio options to their defaults. Open the device properties again and repeat the steps from Method 1 or Method 2. The change then holds until the next driver update.
The sound still seems processed
Windows may be playing audio through a different device than the one that was changed. Check the Output list in Settings > System > Sound and confirm the selected device is the one actually in use, such as headphones or a monitor connected by HDMI.
Frequently Asked Questions
Should audio enhancements be turned off?
It depends on the result. Turning them off helps when sound is distorted, too bass-heavy, or inconsistent between apps. Leaving them on is fine when the sound already feels good.
Does this work on Windows 11 Home?
Yes. Audio enhancement settings are available on Home, Pro, and other editions, as long as the audio driver offers them.
Is administrator access required?
No. A standard user account can change audio enhancement settings on a personal PC. A work or school device may block the change if it is managed by an organization.
Does the PC need a restart afterward?
No. The change takes effect right away. An app that was already playing audio may need to be paused and played again to pick up the new sound.
Will turning off audio enhancements affect battery life or performance?
The effect is small. Enhancements use a little processing power, so turning them off can reduce that load slightly, but most people will not notice a difference on battery or in speed.
Do the changes apply to every audio device?
No. The setting belongs to each playback device separately. Speakers, wired headphones, Bluetooth headphones, and HDMI outputs each need to be changed on their own.
Is there a keyboard shortcut to disable audio enhancements?
There is no dedicated shortcut for this setting. The fastest keyboard route is pressing Windows + I to open Settings, or pressing Windows + R and typing mmsys.cpl to open the classic Sound window.
Why is the Audio enhancements option missing on one device but not another?
Each device uses its own driver. A device with a full manufacturer driver may show the option, while one using a basic Microsoft driver may not. Updating the audio driver is the usual fix.