
Adding a second SSD to a desktop PC is one of the simplest upgrades available for boosting storage space or separating the operating system from personal files. Whether the goal is more room for games, faster backups, or a dedicated drive for work files, the process takes less than an hour for most builds.
Key Takeaways
- Most desktops support either a 2.5-inch SATA SSD or an M.2 NVMe SSD as a second drive, depending on available slots and connectors.
- Mounting, cabling, and BIOS recognition are the three core stages of the installation.
- Windows will not use a new drive until it has been initialized and formatted through Disk Management.
- Static discharge and loose cables are the most common causes of installation problems.
- No special tools are required beyond a screwdriver and, in some cases, a spare SATA cable.
Before You Start
A little preparation prevents most of the headaches that come with hardware upgrades. Take a few minutes to get the workspace and the PC ready before opening the case.
- Power down the desktop completely and unplug it from the wall outlet.
- Press and hold the power button for a few seconds after unplugging to release any residual charge in the system.
- Touch a bare metal part of the case, or use an anti-static wrist strap, to discharge static before handling any internal components.
- Work on a hard, flat surface with good lighting, and keep small screws in a dish so they do not get lost inside the case.
Tip: If the desktop is still under warranty, check whether opening the case voids that coverage before proceeding.
Tools and Materials Needed
- A Phillips-head screwdriver, usually a size 0 or 1.
- The new SSD, either 2.5-inch SATA or M.2 NVMe depending on the motherboard’s available slots.
- A SATA data cable and a free SATA power connector, if installing a 2.5-inch SSD.
- A small Phillips screw for securing an M.2 drive, if one was not included with the motherboard.
- An anti-static wrist strap, optional but useful for extra protection.
How to Add a Second SSD to a Desktop PC Step by Step
The exact steps vary slightly depending on whether the new drive is a 2.5-inch SATA SSD or a smaller M.2 NVMe SSD, so both paths are covered below.
Installing a 2.5-inch SATA SSD
- Step 1: Open the side panel of the case, usually secured with thumbscrews or standard screws along the back edge.
- Step 2: Locate an open drive bay or bracket, often found in a cage near the front of the case or mounted behind the motherboard tray.
- Step 3: Secure the SSD into the bay or bracket using the small screws provided with the case or the drive.
- Step 4: Connect one end of a SATA data cable to the SSD and the other end to an open SATA port on the motherboard, usually labeled SATA0 through SATA5 or similar.
- Step 5: Connect a free SATA power cable from the power supply to the SSD’s power connector.
- Step 6: Double-check both connections are firmly seated, then close the side panel and reconnect the power cable.
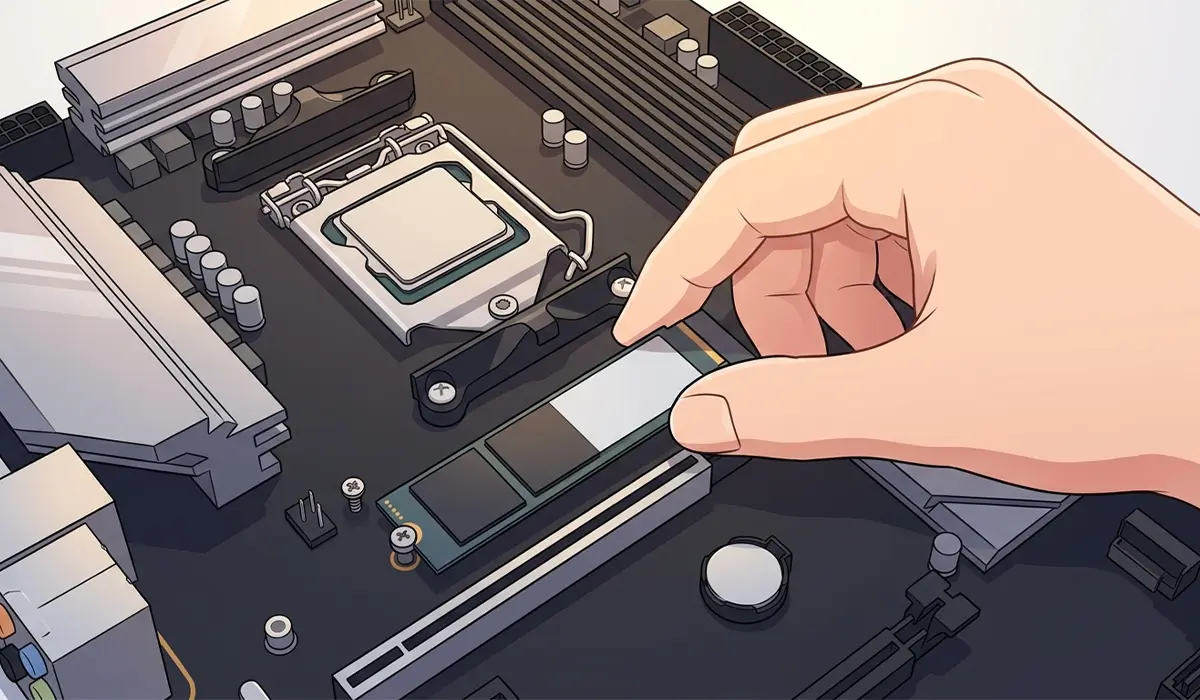
Installing an M.2 NVMe SSD
- Step 1: Open the case and locate an available M.2 slot on the motherboard, often positioned near or under the CPU socket or beneath a heatsink cover.
- Step 2: Remove the small mounting screw or retention clip, along with any protective M.2 heatsink cover if the motherboard includes one.
- Step 3: Insert the SSD into the slot at a slight angle, matching the notch on the drive to the key in the slot so it only fits one way.
- Step 4: Press the drive down flat and secure it with the mounting screw. Reattach the heatsink cover if one was removed.
- Step 5: Close the case and reconnect the power cable. No data or power cables are needed for M.2 drives, since they connect directly to the motherboard.

Tip: Most motherboards support more than one M.2 slot, but some slots share bandwidth with SATA ports. Check the motherboard manual to confirm a chosen slot will not disable other connections.
Setting Up the New SSD in Windows
- Step 1: Power on the PC and enter the BIOS or UEFI setup, usually by pressing Delete or F2 during startup, to confirm the new drive is detected.
- Step 2: Save any BIOS changes if needed, then boot fully into Windows.
- Step 3: Right-click the Start menu and select ‘Disk Management’.
- Step 4: Locate the new drive, which will appear as ‘Unallocated’ space, and right-click it to choose ‘Initialize Disk’.
- Step 5: Select the partition style, either GPT for modern systems or MBR for older setups, then confirm.
- Step 6: Right-click the unallocated space again, choose ‘New Simple Volume’, and follow the prompts to assign a drive letter and format the drive using the NTFS file system.

Once formatting completes, the new SSD will appear in File Explorer and is ready for use as extra storage or an installation target for programs and games.
Common Problems and Fixes
- The new SSD does not appear in BIOS: Reseat the data and power cables for a SATA drive, or reseat the M.2 drive in its slot, making sure it is fully inserted and the retention screw is snug.
- The drive shows in BIOS but not in Windows: This almost always means the drive has not been initialized yet. Open Disk Management and complete the initialization and formatting steps.
- The PC will not boot after installation: Check that no cables were accidentally disconnected from the primary drive while working inside the case, and confirm the boot drive is still set correctly in BIOS.
- The M.2 SSD runs hotter than expected: Confirm a motherboard heatsink is properly seated over the drive, and check that case airflow is not obstructed near the slot.
- Windows assigns a drive letter that conflicts with another device: Return to Disk Management, right-click the new volume, and choose ‘Change Drive Letter and Paths’ to select a different letter.
Frequently Asked Questions
Can any desktop PC support a second SSD?
Most modern desktops support at least one additional SATA or M.2 drive, but availability depends on the motherboard’s number of SATA ports and M.2 slots, along with free physical space in the case.
Is an M.2 NVMe SSD faster than a 2.5-inch SATA SSD?
Yes, M.2 NVMe drives use the PCIe interface and offer significantly higher read and write speeds than SATA SSDs, which are limited by the SATA interface’s bandwidth ceiling.
Does adding a second SSD require reinstalling Windows?
No, a second SSD used purely for additional storage does not require reinstalling Windows. The operating system stays on the original drive, and the new SSD simply gets initialized and formatted.
Can the second SSD be used as a new boot drive instead?
Yes, but that requires either cloning the existing operating system to the new drive or performing a fresh Windows installation and setting the new SSD as the boot device in BIOS.
What is the difference between GPT and MBR when formatting a new drive?
GPT supports larger drive capacities and is required for booting on most modern UEFI systems, while MBR is an older standard still compatible with many secondary storage drives.
Do all M.2 slots on a motherboard support NVMe SSDs?
Not always. Some M.2 slots only support SATA-based M.2 drives, and some share bandwidth with other ports. Checking the motherboard manual before purchasing a drive avoids compatibility issues.
Why does Disk Management show the new SSD as ‘Unallocated’?
This is normal for a brand-new drive. It simply means the drive has not yet been initialized or formatted, which is completed during the Windows setup steps.
Can a second SSD be installed in a laptop the same way?
Some laptops support a second internal SSD in a spare M.2 slot, but the process, available space, and access panels vary widely by model, so it is a separate procedure from desktop installation.
Is it safe to install an SSD without an anti-static wrist strap?
It can be done safely by regularly touching a grounded metal surface, though a wrist strap offers more consistent protection against static discharge that could damage sensitive components.
