
Knowing how to clean and fix a spilled liquid keyboard can mean the difference between a ten-minute rescue and a trip to the electronics store. Speed matters most, because liquid spreads under the keys and onto the circuit board within seconds. This guide covers the exact order of actions for desktop, mechanical, and laptop keyboards, plus how to test the result afterward.
Key Takeaways
- Disconnect power first. For a laptop, shut down, unplug the charger, and remove the battery if it is designed to be removable.
- Turn the device upside down in a tent shape so liquid drains away from the circuit board.
- Sticky drinks like soda, juice, coffee with sugar, and milk need cleaning with 90 percent or higher isopropyl alcohol. Skip the water.
- Allow at least 24 to 48 hours of air drying before powering anything back on.
- Laptop spills that reach the motherboard are best handled by a professional repair shop.
Before You Start
Whatever the keyboard type, safety comes first. Power off, unplug, and stay patient. Rushing at this stage causes most of the permanent damage.
Safety Checklist
- Unplug a USB or wireless keyboard, or switch it off and remove the batteries or disconnect the dongle.
- On a laptop, hold the power button until it shuts down, unplug the charger, and disconnect every external device.
- Touch a bare metal surface or use an anti-static strap before handling any exposed circuit board.
- Work on a clean, flat, well-lit surface covered with a towel.
Tools and Materials Needed
- Absorbent paper towels or a dry microfiber cloth
- Isopropyl alcohol, 90 percent or higher
- Cotton swabs and a soft, dry brush
- Keycap puller or a thin plastic pry tool (never a metal screwdriver on delicate parts)
- Small Phillips screwdriver for desktop keyboard housings
- Lint-free cloth and a shallow tray for storing keycaps and screws
- Compressed air (short bursts only, held at a distance)
One honest note on risk: opening a device may affect its warranty, and a spill that reaches a laptop motherboard is a job for a professional. When a laptop shows odd behavior after a sugary or milky spill, stop and book a repair rather than guessing.
How to Clean and Fix a Spilled Liquid Keyboard Step by Step
The process splits into three parts: the emergency response, the cleaning itself, and the testing. The cleaning part differs slightly between a desktop keyboard and a laptop, so each has its own set of steps.
Emergency Response in the First Five Minutes
- Step 1: Cut the power immediately. Unplug the keyboard, or shut down the laptop by holding the power button, then unplug the charger.
- Step 2: Remove the battery if the laptop has a removable one. Many modern laptops have internal batteries, and in that case skip this step and do not open the case unless comfortable doing so.
- Step 3: Flip the device upside down in a tent position, with the keys facing the surface and the device propped open slightly. Gravity pulls the liquid out and away from the circuit board.
- Step 4: Blot visible liquid with a paper towel. Press and lift instead of wiping, since wiping pushes the spill further under the keys.
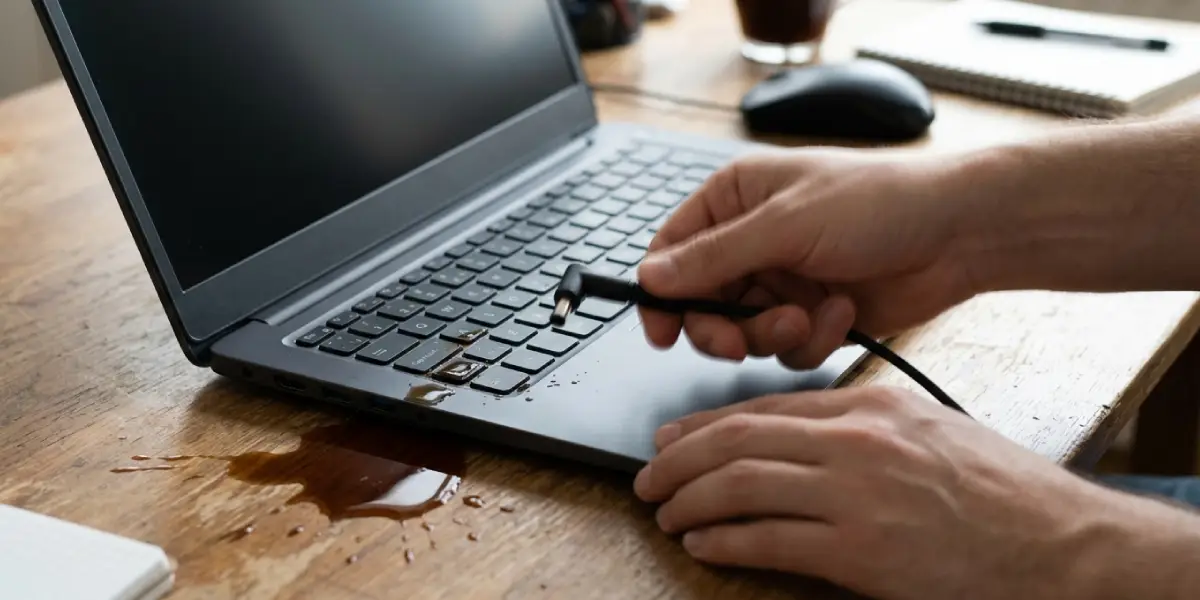
Tip: Resist the urge to turn the device on just to check whether it still works. Power running through a wet board is what causes short circuits and permanent damage.
Cleaning a Desktop or External Keyboard
- Step 1: Take a photo of the key layout so that every keycap goes back in the right place.
- Step 2: Remove the keycaps with a keycap puller, working row by row, and place them in a tray. Pull straight up to avoid cracking the stems.
- Step 3: Unscrew the back of the keyboard housing if the design allows it, then lift out the circuit board and any rubber membrane layers. Keep screws in the tray.
- Step 4: Wash the keycaps separately in a bowl of warm soapy water, rinse them, and set them on a towel to dry fully. Keycaps are plain plastic, so this is safe for them but never for the board.
- Step 5: Clean the plate, case, and any membrane sheets by wiping them with a cloth lightly dampened with isopropyl alcohol.
- Step 6: Clean the circuit board with a soft brush and a cotton swab dampened with isopropyl alcohol, focusing on sticky areas, contacts, and any residue lines. A sugary spill leaves a tacky film that needs gentle repeat passes.
- Step 7: Let every part dry for at least 24 to 48 hours in a dry, room-temperature spot. A warm, airy room works well. Skip the hair dryer, heater, and direct sunlight, because high heat can warp plastic and damage components.
- Step 8: Reassemble the keyboard using the photo as a guide, press each keycap down firmly until it clicks, and reconnect it.
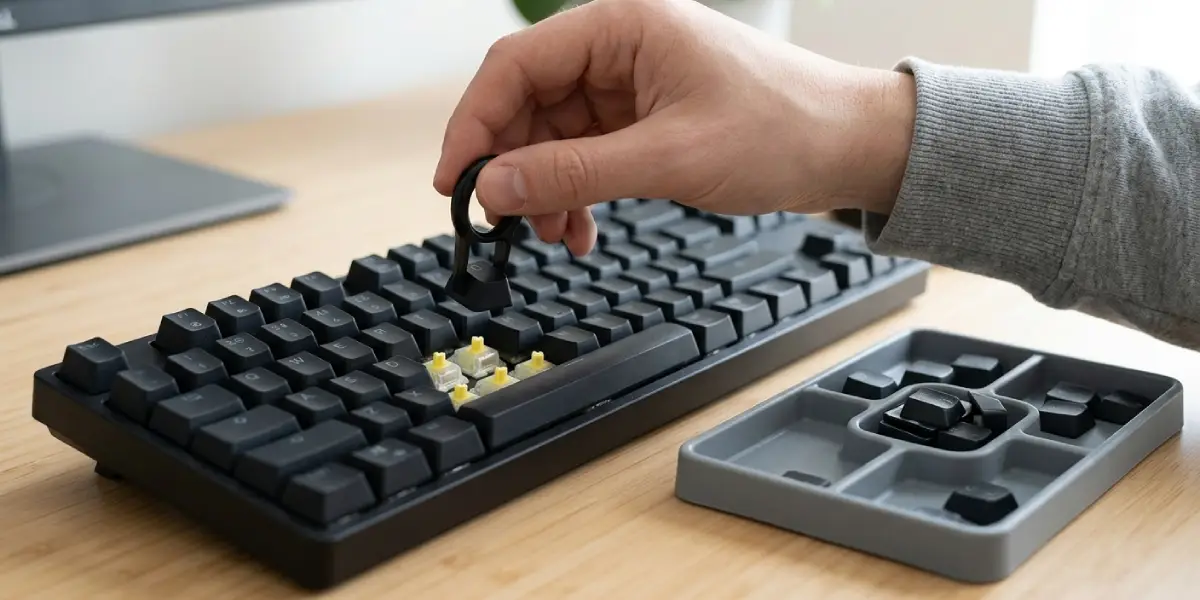
Tip: Mechanical keyboards with hot-swap sockets allow individual switches to be pulled out for a deeper clean. Switches with sticky residue inside may need replacing instead of cleaning.
Cleaning a Spilled Laptop Keyboard
Laptop keyboards are far more delicate. The keys sit on thin scissor mechanisms and a flexible membrane that sits right above the motherboard, so the repair is more limited.
- Step 1: Leave the laptop powered off and tented upside down for at least 24 hours, since liquid travels through gaps for a long time after the spill.
- Step 2: Dab around the keys with a cloth or cotton swab lightly dampened with isopropyl alcohol to remove surface stickiness. Use as little liquid as possible.
- Step 3: Use short bursts of compressed air from a distance to push moisture out from between the keys.
- Step 4: Check for visible dampness around the keys, the touchpad, and the ports before going further. Any signs of liquid beneath the keys means the dried parts are not ready for power yet.
- Step 5: Wait the full 48 hours if the spill was sugary or large, then reconnect the charger and try powering on.
- Step 6: If any key sticks, stays dead, or the laptop shows unusual behavior, stop and have a technician open it, clean the board, and replace the keyboard module if needed.
Testing the Keyboard After Cleaning
Once everything is dry and reassembled, test before trusting it with real work. Open a plain text editor and press every key, including function keys and the space bar. Many operating systems also include an on-screen keyboard that highlights each key as it is pressed, which makes missing responses easy to spot. Online key testers do the same thing for desktop keyboards.
Tip: Test the keys slowly first and then type a paragraph at normal speed. Some faults only show up when keys are pressed in quick succession.
Common Problems and Fixes
Some keys stay sticky after cleaning
Residue from sugary drinks is usually the culprit. Remove the affected keycap, clean the switch area and the underside of the cap with isopropyl alcohol on a cotton swab, and let it dry fully before pressing the key back on.
Certain keys do not register at all
Moisture may still be trapped under the keys or on the membrane. Leave the keyboard to dry for another 24 hours. If the keys remain dead, the circuit traces may have corroded, and replacing the keyboard is the more reliable fix.
Keys type by themselves or repeat
This points to leftover liquid bridging contacts on the board. Power off, disconnect, and repeat the cleaning and drying process. For a laptop that keeps behaving this way, a technician should check the keyboard connection and the board below.
The keyboard is not detected at all
Try a different USB port first, then check the cable for damage. A fully dead desktop keyboard after a thorough cleaning and drying has most likely suffered board damage, and replacement is usually cheaper than repair.
White or green residue appears on the contacts
This is corrosion, and it spreads over time. Clean it gently with a cotton swab dampened with isopropyl alcohol. Heavy corrosion on a laptop board needs professional cleaning.
A laptop will not turn on after the spill
Keep it unplugged and do not keep pressing the power button. Let it dry completely, then take it to a repair shop, since liquid may have reached the motherboard or the battery connection.
Frequently Asked Questions
What should be done first when liquid spills on a keyboard?
Disconnect power right away. Unplug a desktop keyboard, or shut down a laptop and unplug its charger. Then turn the device upside down so the liquid drains away from the circuit board.
Is it safe to use rice to dry a wet keyboard?
No. Rice does not pull moisture out effectively and can leave starch dust and grains inside the keys. Air drying in a dry room is more reliable.
How long does a keyboard need to dry after a spill?
At least 24 to 48 hours. Rushing this step is a common reason a keyboard fails after what looked like a good cleaning job.
Can a keyboard be saved after a sugary drink spill?
Often yes, if cleaned quickly. Sugar dries into a sticky layer that jams keys and attracts corrosion, so the keys need removing and the board cleaned with isopropyl alcohol of 90 percent or higher.
Is water a good way to clean a spilled keyboard?
Not for the board. Water can leave minerals behind and takes longer to dry. Isopropyl alcohol of 90 percent or higher evaporates quickly and dissolves sticky residue, which makes it the safer choice for the circuit board. Only the plastic keycaps can be washed in soapy water.
Can a hair dryer be used to speed up drying?
It is not recommended. Strong heat can warp plastic parts and damage components. Letting the parts air dry at room temperature is the safer route.
Should a spilled laptop keyboard be taken apart at home?
Only if the laptop is designed for easy access and the repair feels manageable. Laptop keyboards sit close to the motherboard, so a spill that goes beyond a few drops is better left to a technician.
When is it better to replace the keyboard instead of cleaning it?
Replacement makes sense when keys stay dead after thorough drying, when corrosion is visible on the board, or when the keyboard is an inexpensive model that costs less than a repair. Laptop keyboards with persistent faults are usually replaced as a module.
Do spill-resistant keyboards need the same cleaning?
Yes. Spill-resistant designs buy time but do not make the device waterproof. The same steps apply, starting with disconnecting power and draining the liquid.
