
Learning how to enable TPM 2.0 in BIOS for Windows 11 usually takes less than five minutes, and it is the most common fix for the ‘This PC can’t run Windows 11’ message. Most modern PCs already contain a TPM, but the setting is often switched off by default. The change happens in the UEFI firmware, and the exact menu name depends on the processor and motherboard brand.
Key Takeaways
- Most PCs from the last several years have TPM 2.0 built into the processor, labeled Intel PTT on Intel systems or AMD fTPM on AMD systems.
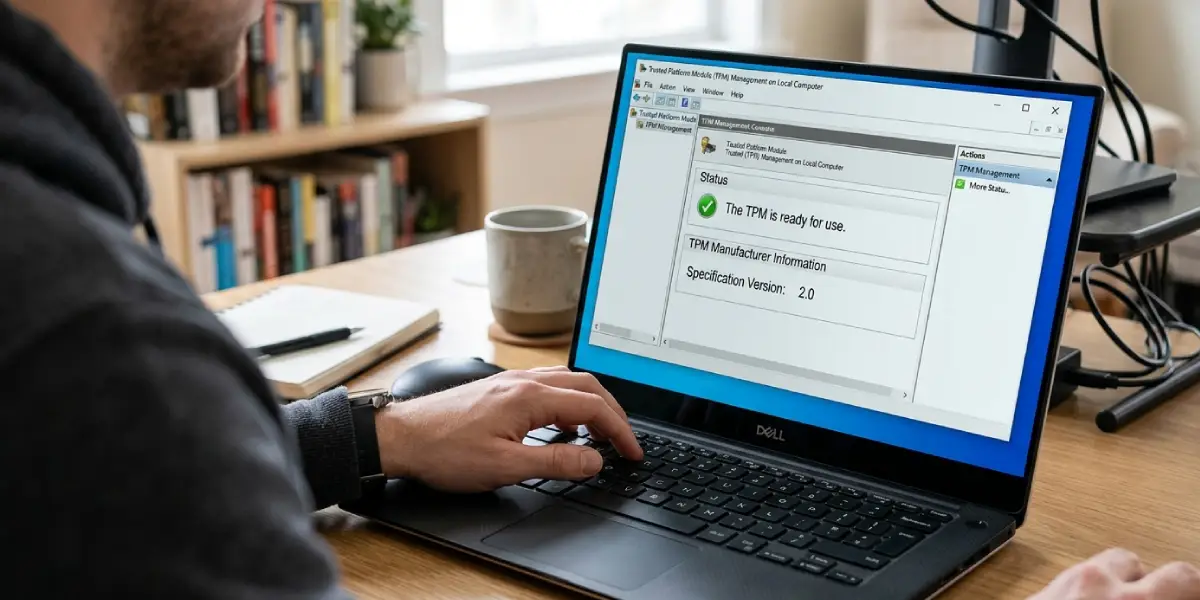
- Check the current status first by pressing Win + R and running tpm.msc. A Specification Version of 2.0 means nothing needs to change.
- The setting lives in the BIOS or UEFI menu under Security, Advanced, or Miscellaneous, depending on the brand.
- Back up the BitLocker recovery key before changing firmware security settings, since a changed TPM state can trigger a recovery prompt.
Before You Start
No tools or disassembly are needed. Only a keyboard and a few minutes are required. A few quick precautions prevent trouble later.
- Save open work and close all programs, since the PC will restart into the firmware menu.
- If BitLocker or Device Encryption is on, back up the recovery key to a Microsoft account or a printed copy. Changing TPM settings can cause the PC to ask for it at the next boot.
- Plug a laptop into power so the battery does not run out while firmware settings are open.
- Avoid changing any BIOS setting that is not mentioned here. If a menu looks unfamiliar or the option is missing, stop and check the manufacturer’s support page or ask a professional technician.
How to Enable TPM 2.0 in BIOS for Windows 11 Step by Step
Check Whether TPM 2.0 Is Already Active
- Step 1: Press the Windows key + R, type tpm.msc, and press Enter.
- Step 2: Look at the status line. If it says ‘The TPM is ready for use’ and the Specification Version shows 2.0, TPM is already working and no BIOS change is needed.
- Step 3: If the window says ‘Compatible TPM cannot be found’, or the version shows 1.2, continue with the steps below.
Enter the BIOS or UEFI Firmware Settings
- Step 1: Open Settings, then System, then Recovery. Under Advanced startup, select Restart now.
- Step 2: After the blue menu appears, choose Troubleshoot, then Advanced options, then UEFI Firmware Settings, and select Restart.
- Step 3: As an alternative, restart the PC and tap the firmware key as the logo appears. Common keys are Del, F2, F10, F12, or Esc, depending on the brand.
- Step 4: If the firmware has an Advanced Mode, switch to it (often with F7), since TPM options are frequently hidden in the simple view.
Turn On TPM on an Intel System
On Intel processors, the feature is called Intel Platform Trust Technology, shortened to Intel PTT. Some boards list it as PTT, others as Intel Platform Trust Technology or Security Device Support.
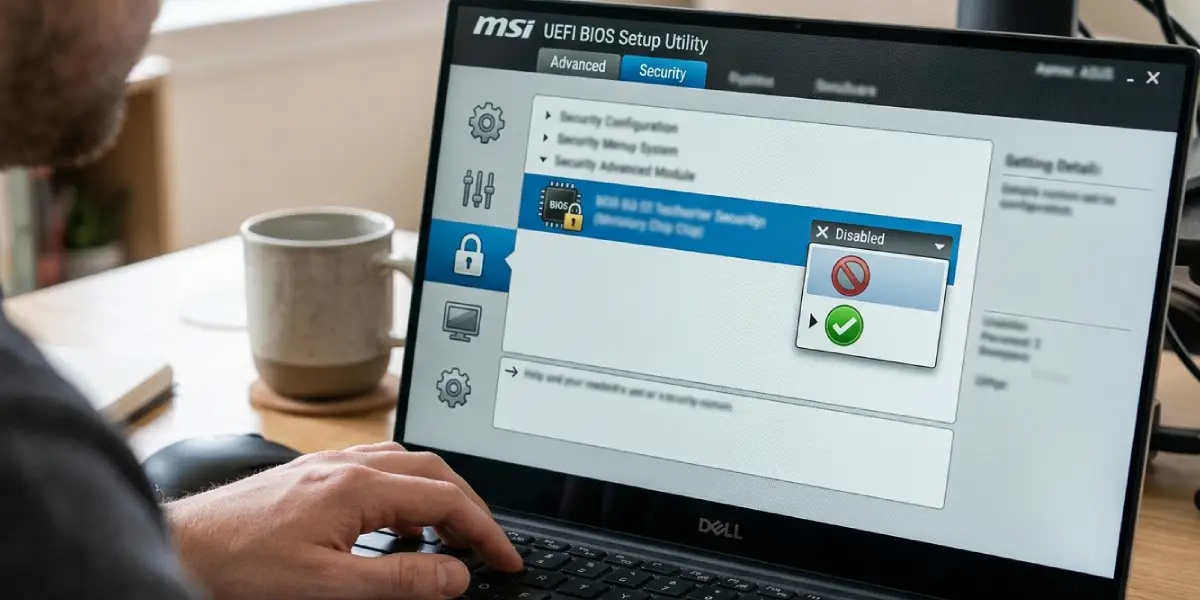
- Step 1: Look in Advanced, Security, Settings, or Miscellaneous for an entry named Intel Platform Trust Technology, PTT, or Security Device Support. On some ASUS boards, it sits under Advanced, then PCH-FW Configuration.
- Step 2: Change the setting from Disabled to Enabled.
- Step 3: On MSI boards, open Settings, then Security, then Trusted Computing, set Security Device Support to Enabled, and set TPM Device Selection to PTT if the option appears.
Turn On TPM on an AMD System
On AMD Ryzen systems, the feature is called AMD fTPM, short for firmware TPM. Some boards label it AMD CPU fTPM.
- Step 1: Open Advanced or Settings and look for AMD fTPM Configuration, AMD CPU fTPM, or Trusted Computing.
- Step 2: Set the option to Enabled. If a choice appears for TPM type, select Firmware TPM rather than Discrete TPM unless a separate TPM chip is installed on the board.
- Step 3: On Gigabyte boards, the entry is usually under Settings, then Miscellaneous, labeled AMD CPU fTPM or Intel Platform Trust Technology.
Turn On TPM on Dell, HP, and Lenovo Laptops
- Step 1: On Dell systems, open the Security section and look for TPM 2.0 Security, then check the TPM On box.
- Step 2: On HP systems, open the Security tab and look for TPM Embedded Security or TPM Device, then set it to Available or Enabled.
- Step 3: On Lenovo systems, open Security, then Security Chip, and set it to Enabled. Some models list it as Intel PTT or AMD fTPM under the same menu.
Save the Changes and Verify
- Step 1: Press F10 or use the Save and Exit option, then confirm the changes.
- Step 2: Let the PC boot into Windows. If a BitLocker recovery screen appears, enter the saved recovery key.
- Step 3: Press Win + R again, run tpm.msc, and confirm that the status reads ready for use and the Specification Version reads 2.0.
- Step 4: Run the PC Health Check app or the Windows 11 upgrade check in Windows Update to confirm the TPM requirement is now met.
Tip: Take a quick phone photo of the BIOS screen before changing anything. If a setting ends up in the wrong place, the original value is easy to restore.
Why Windows 11 Needs TPM 2.0
A TPM, or Trusted Platform Module, is a small security component that stores encryption keys and checks that startup files have not been tampered with. Windows 11 uses it for features such as BitLocker, Windows Hello, and Secure Boot validation. Think of it as a locked safe built into the PC that only the system itself can open. Because the safe is tied to the hardware, stolen files and passwords are much harder to misuse.
Common Problems and Fixes
No TPM Option Appears in the BIOS
The option may be hidden in the simple view, so switch to Advanced Mode first. Search the Security, Advanced, and Miscellaneous menus. If nothing appears, check the manufacturer’s support page for a BIOS update, since older firmware versions sometimes hide or lack the PTT or fTPM setting. Very old systems may have no TPM 2.0 support at all.
tpm.msc Still Says Compatible TPM Cannot Be Found
Restart the PC fully after saving the BIOS changes, then run tpm.msc again. If the message remains, re-enter the BIOS and confirm the setting stayed on Enabled. A dead CMOS battery can cause settings to reset, which is common on older desktops.
The TPM Shows Version 1.2 Instead of 2.0
Some older motherboards with a separate TPM header or chip let the TPM mode be switched between 1.2 and 2.0 in the BIOS. Look for a TPM Device Selection or TPM Spec Version option and choose 2.0. If only 1.2 is offered, the hardware does not support the Windows 11 requirement.
BitLocker Asks for a Recovery Key After the Change
This is expected after a TPM state change. Enter the recovery key saved earlier. It is stored in the Microsoft account under the devices page, or in the printed or saved copy made before the change. After signing in, BitLocker resumes normal protection.
PC Health Check Still Reports a Problem After TPM Is Enabled
The TPM may be fine while another requirement fails, such as Secure Boot or UEFI mode. Open the PC Health Check app and read exactly which item is listed. Secure Boot is usually enabled in the same Security or Boot menu, and it requires the system disk to use the GPT partition style.
Frequently Asked Questions
What is TPM 2.0 and why does Windows 11 require it?
TPM 2.0 is a hardware or firmware security module that stores encryption keys and verifies system integrity. Windows 11 requires it to support BitLocker, Windows Hello, and other security features.
How do I know if my PC already has TPM 2.0 enabled?
Press Win + R, type tpm.msc, and press Enter. If the window shows the TPM is ready for use with Specification Version 2.0, it is already enabled.
What is the difference between Intel PTT and AMD fTPM?
Both are firmware-based versions of TPM 2.0 built into the processor platform. Intel PTT is used on Intel systems and AMD fTPM is used on AMD Ryzen systems. Windows 11 treats either as a valid TPM 2.0.
Which key opens the BIOS on my computer?
It depends on the brand. Del and F2 are the most common, while F10, F12, and Esc are used by some laptops. The Advanced startup route inside Windows Settings works on any UEFI-based PC without needing a key.
Will enabling TPM 2.0 delete my files or reset Windows?
No. Turning on the TPM setting does not erase data or reinstall Windows. The only side effect is a possible BitLocker recovery prompt if drive encryption is active.
Is it safe to change the TPM setting in the BIOS?
Yes, when only the TPM option is changed and nothing else. Writing down or photographing the original setting and keeping the BitLocker recovery key handy makes the process low risk.
Can Windows 11 be installed without TPM 2.0?
Microsoft sets TPM 2.0 as a requirement for supported installs. Workarounds exist, but they leave the PC in an unsupported state and may limit updates, so enabling TPM 2.0 is the recommended route.
Why is there no TPM option in my BIOS?
The option may be hidden in the simple view, may sit under a different name, or may need a BIOS update to appear. Very old hardware may not support TPM 2.0 at all, in which case the manufacturer’s specification page is the best place to confirm.
