
Knowing how to fix monitor overscan with HDMI saves a lot of frustration when the taskbar, window corners, or menu edges vanish off the screen. Overscan is a scaling problem, not a hardware failure, and it can almost always be corrected in a few minutes with the right setting on the display or in the graphics driver.
Key Takeaways
- Overscan happens when the display zooms the picture slightly and crops the edges, most often because it treats the HDMI signal as TV video instead of a PC signal.
- The fastest fix is usually on the display itself: set the picture size to a 1:1 option such as Just Scan, Screen Fit, Full Pixel, or Dot by Dot.
- If the display has no such option, the graphics driver (NVIDIA, AMD, or Intel) can correct the scaling.
- The Windows or macOS resolution must match the native resolution of the screen, otherwise cropping or blur returns.
Common Causes of HDMI Overscan
HDMI carries both computer and television video formats. When a monitor or TV sees what looks like a standard TV format, it may apply old broadcast-style overscan, which pushes the outer edges of the image beyond the visible area. Several things can trigger that behavior.
- The display is set to a picture size or aspect mode that zooms the image, such as 16:9 with overscan, Zoom, or Original on some TVs.
- The HDMI input is not labeled or switched into a PC or Game mode, so the TV applies its video processing.
- The graphics driver is sending a TV-style resolution or applying its own scaling or overscan adjustment.
- The desktop resolution is not the native resolution of the screen.
- A driver update or a change of HDMI port reset a setting that was previously correct.
Before You Start
No tools or disassembly are needed for this fix. Just keep the TV remote or the monitor’s on-screen menu buttons within reach, and make sure the HDMI cable is fully seated at both ends. It also helps to install the latest graphics driver from the GPU maker first, since menu names below can vary slightly between driver versions and display brands.
How to Fix Monitor Overscan With HDMI Step by Step
Fix 1: Change the Picture Size on the Display
This is the most reliable fix, and it should be tried first because it removes the scaling at the source.
- Step 1: Open the monitor or TV on-screen menu using its buttons or remote, then go to the picture or display settings.
- Step 2: Find the picture size, aspect ratio, or screen fit setting.
- Step 3: Choose the option that shows the image with no scaling. Common names include Just Scan (LG), Screen Fit, Full Pixel, 1:1 Pixel Mapping, Dot by Dot, and Native. On many monitors, an Overscan setting simply needs to be switched off.
- Step 4: If the TV offers a PC or Game picture mode, or lets the HDMI input be renamed or tagged as PC, select it. Many TVs then disable overscan and extra processing automatically.
- Step 5: Check that the full desktop, including all four screen edges and the taskbar, is now visible.
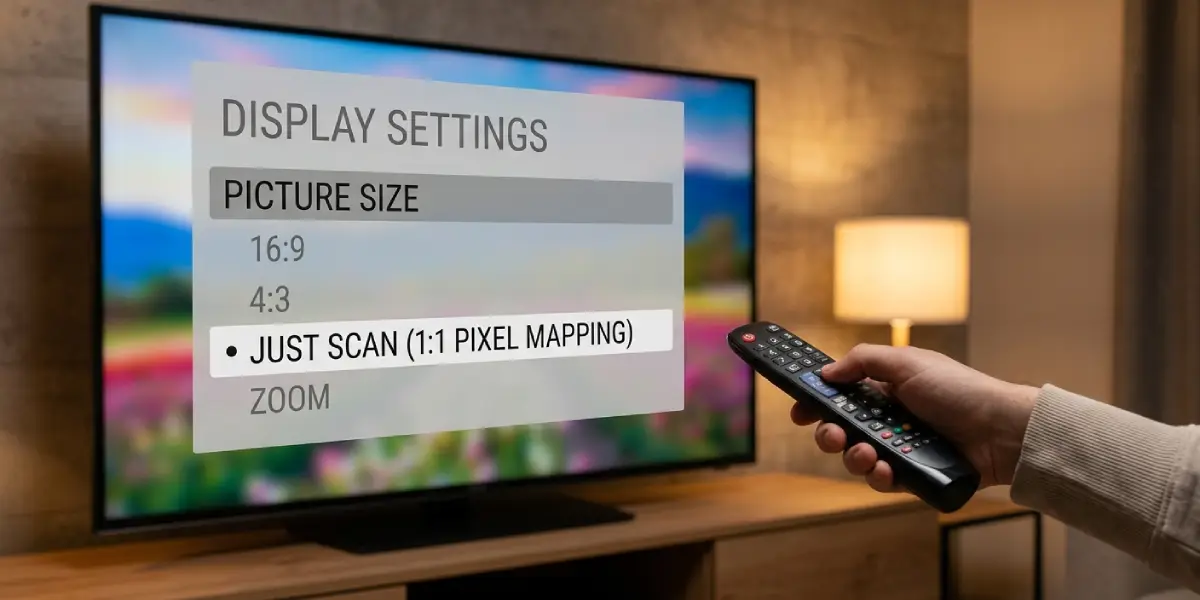
Tip: On many TVs the aspect or Just Scan setting is saved per HDMI input, so it may need to be set again if the cable is moved to a different port.
Fix 2: Set the Correct Resolution in Windows
- Step 1: Right-click an empty area of the desktop and choose Display settings.
- Step 2: Select the affected display, then open the Display resolution drop-down.
- Step 3: Pick the resolution marked Recommended, which is the native resolution of the screen.
- Step 4: Keep the new setting when prompted and confirm the edges are visible.
Fix 3: Correct Scaling in the NVIDIA Control Panel
- Step 1: Right-click the desktop, open the NVIDIA Control Panel, and expand the Display section.
- Step 2: Open Change resolution and choose the native resolution from the PC list rather than an Ultra HD, HD, or SD television entry when a PC entry is available.
- Step 3: Open Adjust desktop size and position.
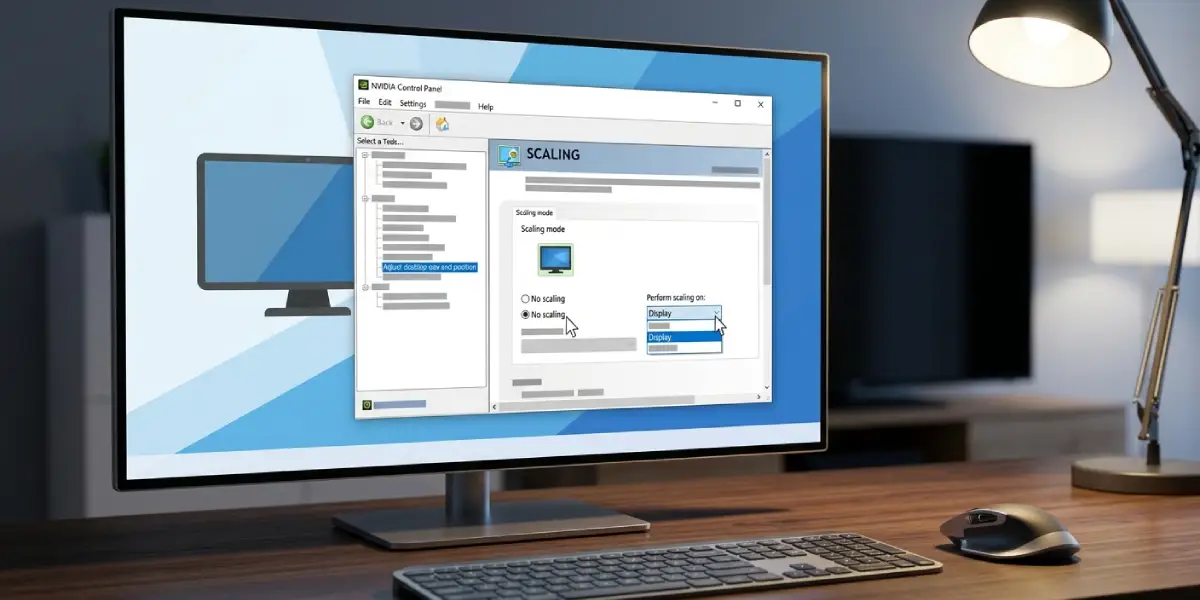
- Step 4: Set Scaling mode to No scaling and set Perform scaling on to Display, so the screen handles the signal itself without extra zooming.
- Step 5: Click Apply and check the screen edges. Where a desktop resizing option is offered, it can be used to fine-tune a stubborn edge.
Fix 4: Adjust HDMI Scaling in AMD Radeon Software
- Step 1: Open AMD Radeon Software and go to Settings, then Display.
- Step 2: Find the HDMI Scaling slider for the connected display. In older versions of the software it is labeled Overscan or Underscan.
- Step 3: Move the slider toward 0 percent until the full picture fits on the screen without a black border.
- Step 4: Check that GPU Scaling is not stretching the image. If Scaling Mode is available, a setting that preserves the aspect ratio avoids a distorted picture.
Fix 5: Check Scaling in Intel Graphics Settings
- Step 1: Open Intel Graphics Command Center and go to the Display section.
- Step 2: Make sure the native resolution is selected for the HDMI display.
- Step 3: In the scaling options, choose the one that maintains the display scaling or keeps the aspect ratio instead of one that stretches the image to fill the screen.
- Step 4: Apply the change and check all four edges of the screen.
Fix 6: Fix Overscan on a Mac
- Step 1: Open System Settings, then Displays, and select the HDMI display.
- Step 2: Choose the resolution that matches the native resolution of the screen. If needed, use the option to show all resolutions.
- Step 3: Where a TV-style display offers an Overscan or Underscan option in the display settings, set it so the image fits the screen.
- Step 4: If the option is not present, return to the TV or monitor and turn on its Just Scan, Screen Fit, or PC mode setting described in Fix 1.
Tip: Fix the display side first and the graphics driver second. Stacking a driver adjustment on top of a display that is still zooming the image is the most common reason the picture ends up blurry or shrunken.
Common Problems and Fixes
The Picture Has Black Borders After the Fix
This is underscan, the opposite of overscan. It means a driver slider or scaling setting was pushed too far. Return the AMD HDMI Scaling slider toward 0 percent, or set the NVIDIA Scaling mode to No scaling, and confirm the display itself is on a 1:1 option.
Text Looks Blurry or Soft
Blur appears when the resolution is not native or when scaling is applied twice. Set the recommended resolution, switch the display to a 1:1 picture size, and turn off any extra scaling in the graphics driver.
The Overscan Setting Is Missing or Greyed Out
Some TVs hide the picture size option until the signal is recognized as PC video. Switch the TV to PC or Game mode, tag the HDMI input as PC where possible, and make sure the PC is sending the native resolution.
The Problem Returns After a Driver Update or Port Change
Driver updates can reset scaling to default, and TV settings are often stored per HDMI input. Recheck the display’s picture size setting on the input in use and reapply the driver scaling setting if needed.
The Edges Are Still Cropped After Every Setting
Try a different HDMI port on the display and a known good HDMI cable, then restart the PC with the display connected. If the edges stay cropped on several inputs and several devices, a firmware or panel issue on the display is more likely, and the manufacturer’s support is the right next step.
Frequently Asked Questions
What is monitor overscan?
Overscan is when a display zooms the picture slightly so the outer edges are cropped off the visible screen. It is a leftover from old television broadcast standards.
Why does overscan happen over HDMI but not DisplayPort or DVI?
HDMI supports television video formats, so a display may treat the signal as TV video and apply overscan. DisplayPort and DVI are usually treated as computer signals, so the issue appears far less often.
Does overscan reduce picture quality?
Yes. Overscan scales the image, which can soften text and push edge content off screen. Using a 1:1 picture size restores a sharp pixel-for-pixel image.
What is the difference between overscan and underscan?
Overscan crops the edges of the picture off the screen, while underscan shrinks the picture and leaves black borders around it. Both come from mismatched scaling between the PC and the display.
What does the Just Scan setting do?
Just Scan, the name LG uses, shows the image without cropping or zooming. Other brands use names such as Screen Fit, Full Pixel, 1:1 Pixel Mapping, Dot by Dot, or Native.
Can the wrong resolution cause cropped screen edges?
Yes. A resolution that does not match the native resolution of the screen can cause cropping, stretching, or blur. The resolution marked Recommended in Windows is the correct choice in most cases.
Will a different HDMI cable fix overscan?
Rarely. Overscan is a scaling setting rather than a cable fault. Trying another cable or HDMI port only helps when the signal is unstable or when the display applies different settings to each input.
Why does the picture look stretched after the fix?
A stretched picture usually means a scaling mode in the graphics driver or on the display is filling the screen instead of keeping the aspect ratio. Switch to a setting that preserves the aspect ratio or uses no scaling.
Do graphics driver updates reset overscan settings?
They can. After a driver update, recheck the scaling options in the NVIDIA, AMD, or Intel software and confirm the display is still set to a 1:1 picture size.
