
Knowing how to rename an audio device in Windows 11 saves a lot of guessing when the sound menu is full of names like ‘Speakers (Realtek(R) Audio)’ or ‘Headset Earphone’. A clear name such as ‘Desk Speakers’ or ‘Streaming Mic’ makes it easy to pick the right device in seconds. The steps below work on Home, Pro, and every other edition, and no special hardware is needed.
Key Takeaways
- The quickest route is Settings > System > Sound, where the Rename button sits on each device’s properties page.
- Output devices (speakers, headphones) and input devices (microphones) can both be renamed.
- The classic Sound window, opened from Control Panel or with mmsys.cpl, gives a second way to reach the same result.
- The device must be connected and enabled to be renamed.
- Changing the name does not affect sound quality, volume, or performance.
Step-by-Step Guide to Rename an Audio Device in Windows 11
Plug in or connect the speakers, headphones, or microphone first. A Bluetooth headset, for example, should be paired and switched on before starting.
Method 1: Use the Settings App
- Press Windows + I to open Settings.
- Go to Settings > System > Sound.
- Scroll to the Output section for speakers and headphones, or the Input section for microphones.
- Click the name of the device to rename. Its properties page opens.
- Click the Rename button near the top of the page.
- Type the new name in the text box. Short, descriptive names work best, such as ‘Living Room Speakers’ or ‘Laptop Mic’.
- Click Rename to confirm.
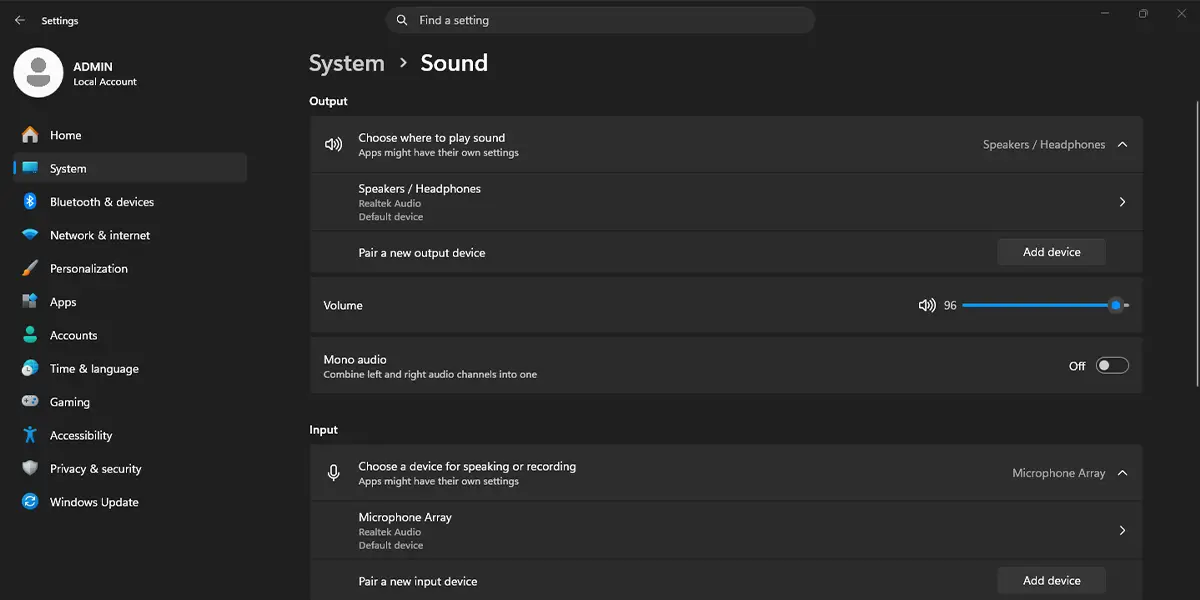
The new name appears at the top of the properties page and in the device list right away. Go back to Settings > System > Sound to check that the list shows the updated name.
Tip: Output and input devices both live on the same Sound page, so a headset that has a speaker side and a microphone side can be given matching names in one visit, such as ‘Gaming Headset Speakers’ and ‘Gaming Headset Mic’.
Method 2: Use the Classic Sound Window
This older window is handy when the Settings page is slow to load or a device does not seem to respond there. It is reached through Control Panel.
- Click Start, type Control Panel, and open it.
- Go to Control Panel > Hardware and Sound > Sound.
- Open the Playback tab for speakers and headphones, or the Recording tab for microphones.
- Select the device, then click Properties.
- On the General tab, click in the name box at the top and replace the existing text with the new name.
- Click OK to save the change.
The device list in the Sound window refreshes with the new name. If a prompt asks for administrator permission, approve it with an administrator account.
Tip: Press Windows + R, type mmsys.cpl, and press Enter to jump straight to the Sound window without opening Control Panel.
How to Undo or Reverse This Change
There is no separate reset button for a device name. To go back, repeat Method 1 or Method 2 and type the original name, such as ‘Speakers’ or ‘Headphones’, in the name box. A driver reinstall or update can also bring back the default name on its own.
Common Problems and Fixes
The Rename Button Is Missing
The device usually is not connected or is turned off. Reconnect it, make sure it is switched on, and reopen Settings > System > Sound. If the button is still missing, use Method 2, which edits the name from the device’s Properties window.
The Name Will Not Save
A work or school PC may restrict changes to device settings, and a standard account may be asked for administrator approval. Sign in with an administrator account and try again, or ask the IT department if the PC is managed.
The Old Name Still Shows in an App
Apps that were open during the rename may keep showing the previous name. Close the app completely and open it again, and the updated name should appear in its audio settings.
The Name Changed Back After an Update
Installing or updating an audio driver can reset the device to its default name. Rename the device again using Method 1 and the custom name returns.
Frequently Asked Questions
Can I rename an audio device in Windows 11 Home?
Yes. Both methods in this guide work on Windows 11 Home, Pro, and other editions.
Do I need to restart the PC after renaming an audio device?
No restart is needed. The new name shows up straight away in Settings and in the Sound window. Apps that were already open may need to be closed and reopened to display it.
Can I rename a microphone as well as speakers?
Yes. Open Settings > System > Sound, click the microphone under Input, and use the Rename button. In the classic Sound window, use the Recording tab instead.
Can I rename Bluetooth headphones the same way?
Yes, as long as the headphones are connected. Once they appear under Output in Settings > System > Sound, the same steps apply.
Does renaming an audio device affect sound quality or performance?
No. Only the label changes. Volume, audio format, and driver behavior stay exactly the same, and there is no effect on battery life or system speed.
Why is the Rename option missing for my audio device?
The most common reason is that the device is disconnected or disabled. Reconnect it, then check Settings > System > Sound again. The Properties window in the classic Sound window is a good alternative.
Is there a quick way to open the classic Sound window?
Press Windows + R, type mmsys.cpl, and press Enter. The Sound window opens with the Playback, Recording, Sounds, and Communications tabs.
Will the custom name stay after a driver update?
Not always. A driver update or reinstall can reset the name to the default. Repeat the rename steps to apply the custom name again.