
Learning how to set up AutoArchive in Outlook is one of the simplest ways to keep an inbox from turning into digital clutter. This built-in feature quietly moves older emails, calendar items, and tasks to a separate file on a schedule you control. The steps below walk through the exact settings needed to turn it on safely, without losing anything important along the way.
Key Takeaways
- AutoArchive is turned on through File > Options > Advanced in the desktop version of Outlook.
- Default settings archive items older than a set number of months into a local .pst file.
- Individual folders can have their own AutoArchive rules, separate from the global default.
- Choosing to move items (rather than delete them) is the safer option for most users.
- Archived items stay searchable and can be moved back to the inbox at any time.
How to Set Up AutoArchive in Outlook Step by Step
Turn On the Global AutoArchive Settings
- Step 1: Open Outlook on the desktop and click ‘File’ in the top-left corner, then select ‘Options’.
- Step 2: In the Outlook Options window, click ‘Advanced’ from the list on the left.
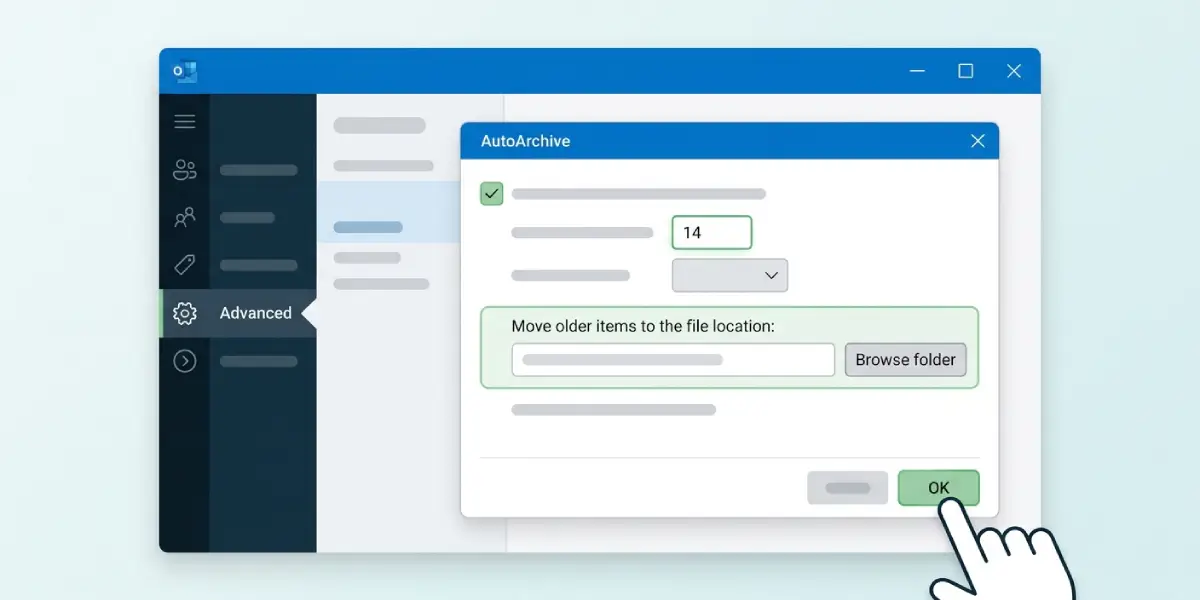
- Step 3: Scroll down to the ‘AutoArchive’ section and click the ‘AutoArchive Settings’ button.
- Step 4: Check the box labeled ‘Run AutoArchive every’ and set the number of days between runs. Fourteen days is a common starting point for most inboxes.
- Step 5: Decide whether to keep the ‘Prompt before AutoArchive runs’ box checked. Leaving it on gives a heads-up notification each time the process is about to start, which many users find reassuring at first.
- Step 6: Under ‘During AutoArchive’, set ‘Clean out items older than’ to a timeframe that fits, such as 6 months or 1 year.
- Step 7: Choose ‘Move old items to’ and confirm the file path shown, or click ‘Browse’ to pick a different location for the archive file. Most setups default to an archive.pst file inside the Outlook data folder.
- Step 8: Click ‘Apply these settings to all folders now’ if every folder should follow the same rule. Skip this if specific folders need different timing.
- Step 9: Click ‘OK’ to save the AutoArchive settings, then click ‘OK’ again to close the Options window.
Tip: Avoid selecting ‘Permanently delete old items’ the first time AutoArchive is set up. Moving items to an archive file keeps everything recoverable while the schedule is being tested.
Customize AutoArchive for a Single Folder
- Step 1: Right-click the folder that needs its own rule, such as a specific project folder or Sent Items.
- Step 2: Select ‘Properties’ from the menu, then open the ‘AutoArchive’ tab.
- Step 3: Choose ‘Archive this folder using these settings’ to set a custom timeframe just for that folder.
- Step 4: Adjust the ‘Clean out items older than’ field and confirm the archive destination, then click ‘OK’.
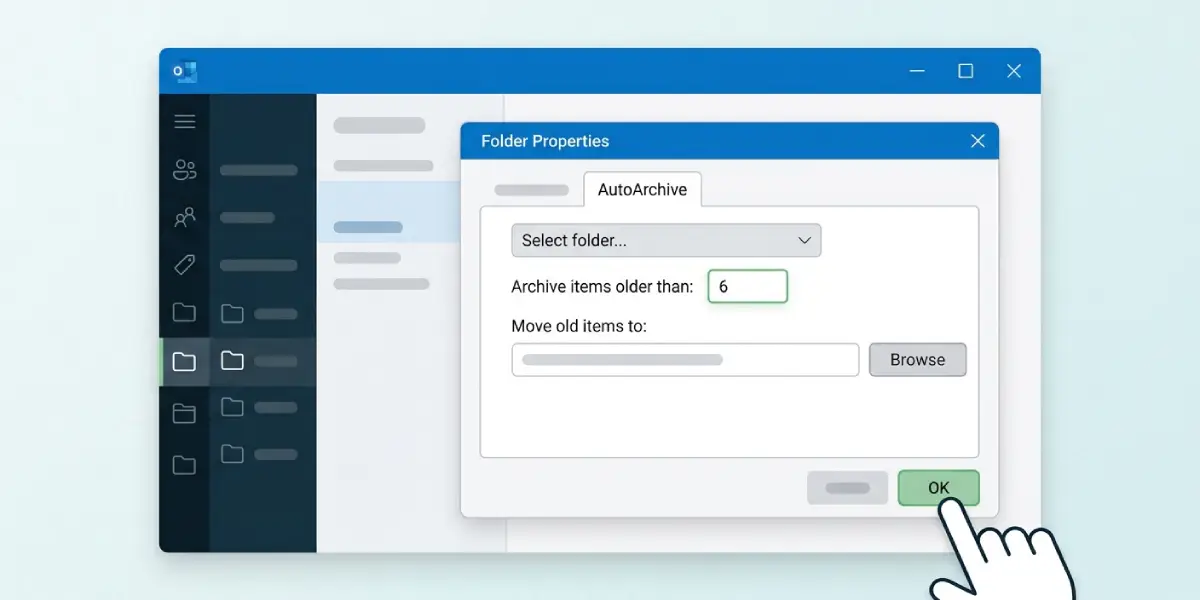
This works best when certain folders, like a shared reference folder, need to stay untouched while the rest of the mailbox archives normally.
Common Problems and Fixes
- AutoArchive tab or settings are missing: This usually happens on Outlook.com, Microsoft 365 mailboxes using Online Archive, or IMAP accounts, since AutoArchive is designed for local .pst-based accounts. Check the account type under File > Account Settings to confirm.
- AutoArchive never seems to run: The feature only triggers while Outlook is open and only on the interval set in Step 4. Leaving Outlook closed at the scheduled time means it will simply run the next time the app is opened.
- Archived items can’t be found: Go to File > Open & Export > Open Outlook Data File, or check File > Account Settings > Data Files, to locate and reopen the archive.pst file. Once added back, an ‘Archives’ folder appears in the folder list.
- Settings appear grayed out: This is often the result of an organization’s Group Policy disabling AutoArchive for compliance or retention reasons. Contact an IT administrator to confirm before assuming it’s a bug.
- Items get archived too soon or too late: Double-check the ‘Clean out items older than’ value, since it’s easy to select ‘months’ when ‘years’ was intended, or the reverse.
Frequently Asked Questions
What does AutoArchive actually do in Outlook?
AutoArchive automatically moves emails, calendar entries, tasks, and notes older than a set age into a separate archive file, freeing up space in the main mailbox without permanently deleting anything by default.
Is AutoArchive available in all versions of Outlook?
AutoArchive is available in the desktop version of Outlook for Windows (Outlook 2016 through Outlook for Microsoft 365). It is not available in Outlook on the web or in Outlook for Mac in the same form.
Will AutoArchive delete emails permanently?
Only if the ‘Permanently delete old items’ option is selected during setup. By default, AutoArchive moves items rather than deleting them.
Where do archived items go?
They move to a local .pst file, usually named archive.pst, stored in the Outlook data files folder unless a different location was chosen during setup.
Can archived emails be moved back to the inbox?
Yes. Open the Archives folder in the folder pane, then drag any item back to the inbox or its original folder at any time.
Why doesn’t AutoArchive work on a shared or Exchange Online mailbox?
Many Exchange Online and Microsoft 365 accounts use Online Archive or retention policies instead of local AutoArchive, so the traditional settings may be unavailable or managed by an administrator.
How often should AutoArchive run?
Every 14 days is a common default, though a busy mailbox may benefit from a shorter interval, such as every 7 days, while a lighter mailbox can run monthly.
Can different folders have different AutoArchive schedules?
Yes. Each folder’s Properties window includes its own AutoArchive tab, allowing custom timeframes separate from the global setting.
What happens if the archive.pst file gets too large?
A very large .pst file can slow down searches and syncing. Splitting older content into a second archive file or adjusting the archive timeframe helps keep file size manageable.
Does AutoArchive back up data?
No. AutoArchive reorganizes where items are stored but is not a substitute for a proper backup, since the archive.pst file lives on the same device as the rest of the mailbox data.
