
Learning how to clean GPU fans and heatsink components properly is one of the simplest ways to bring a hot, noisy graphics card back to normal temperatures. Dust builds up in the fan blades and heatsink fins over months of use, trapping heat and forcing the fans to spin faster just to keep pace. A thorough cleaning session, done the right way, restores airflow and quiets the whole system down.
Key Takeaways
- Compressed air and a soft brush handle most GPU dust buildup without needing full disassembly.
- Fan blades should be held still while blasting them with air, since spinning them too fast can damage the bearings.
- Heavier dust caked into the heatsink fins usually means the card needs to come out of the case for a proper cleaning.
- Reapplying thermal paste is only necessary if the heatsink is being fully removed from the GPU die.
- Regular cleaning every three to six months prevents the kind of dust buildup that leads to thermal throttling.
Before You Start
Physical work inside a PC calls for a few basic precautions. Skipping them is how a routine cleaning turns into an expensive mistake.
- Power down the computer completely and unplug it from the wall outlet.
- Press the power button for a few seconds after unplugging to drain any residual charge from the system.
- Touch a bare metal part of the case, or use an anti-static wrist strap, before handling any internal components.
- Let the system sit for a few minutes if it was just running, since the heatsink and card can still be warm to the touch.
- Have the following on hand: a can of compressed air, a soft-bristle brush (an unused paintbrush or a dedicated anti-static brush works well), a microfiber or lint-free cloth, isopropyl alcohol at 90 percent concentration or higher, and a screwdriver that matches the fan screws on the card.
Tip: Working on a solid, well-lit surface such as a kitchen table or workbench makes it far easier to spot dust that a quick glance inside the case would miss.
How to Clean GPU Fans and Heatsink Step by Step
Cleaning Without Removing the Card
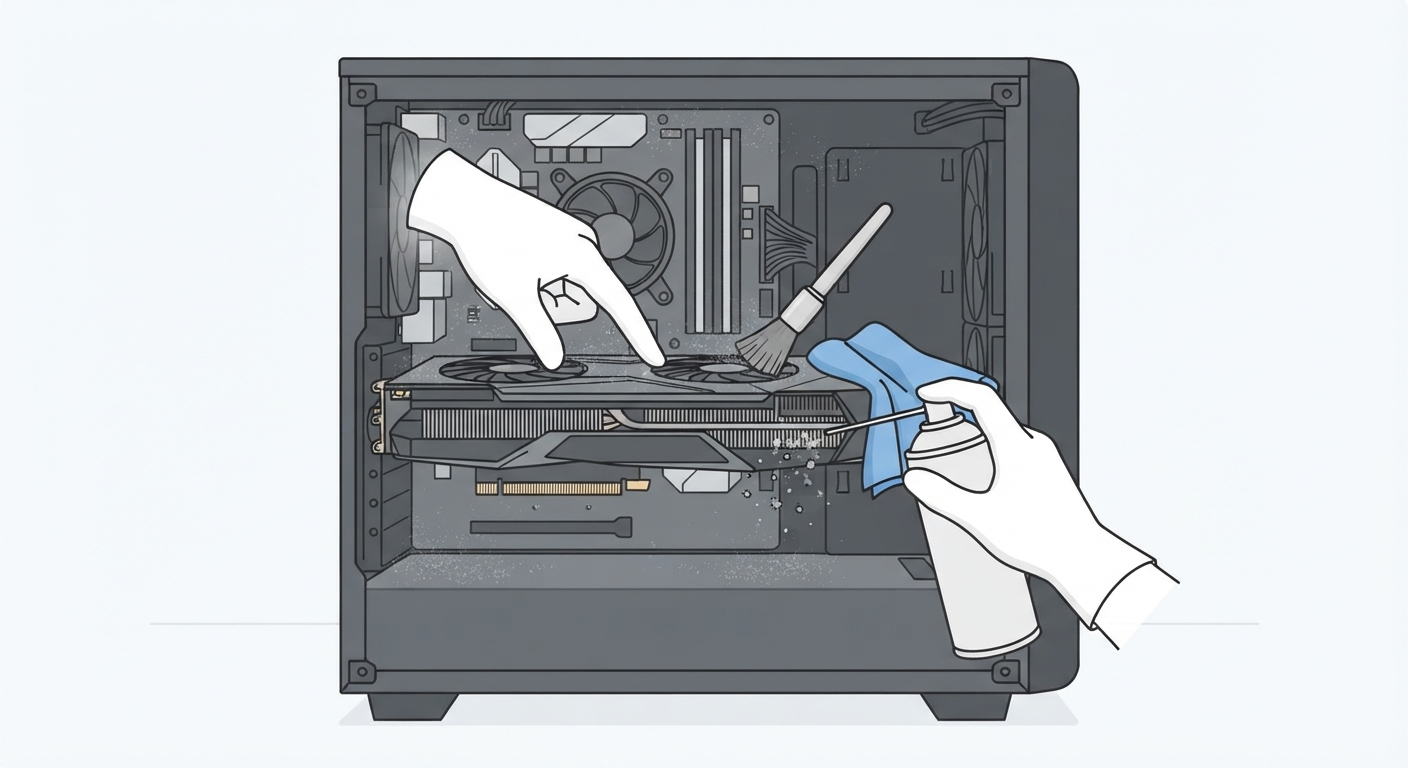
For light to moderate dust, the graphics card can often be cleaned right where it sits in the case. This is the fastest route and works well as routine maintenance.
- Step 1: Open the side panel of the case and set it aside somewhere it will not get knocked over.
- Step 2: Hold each fan blade still with a finger or a small piece of tape while spraying short bursts of compressed air across it. This stops the fan from free-spinning past its rated speed, which can strain or damage the bearings.
- Step 3: Angle the compressed air into the heatsink fins from multiple directions to dislodge dust that has settled between them.
- Step 4: Use the soft brush to loosen any stubborn dust clumps on the fan hub or shroud, then follow up with another round of compressed air to clear the loosened particles.
- Step 5: Wipe down the visible plastic shroud and metal backplate with a microfiber cloth to remove any remaining film of dust.
Removing the Card for a Deeper Clean
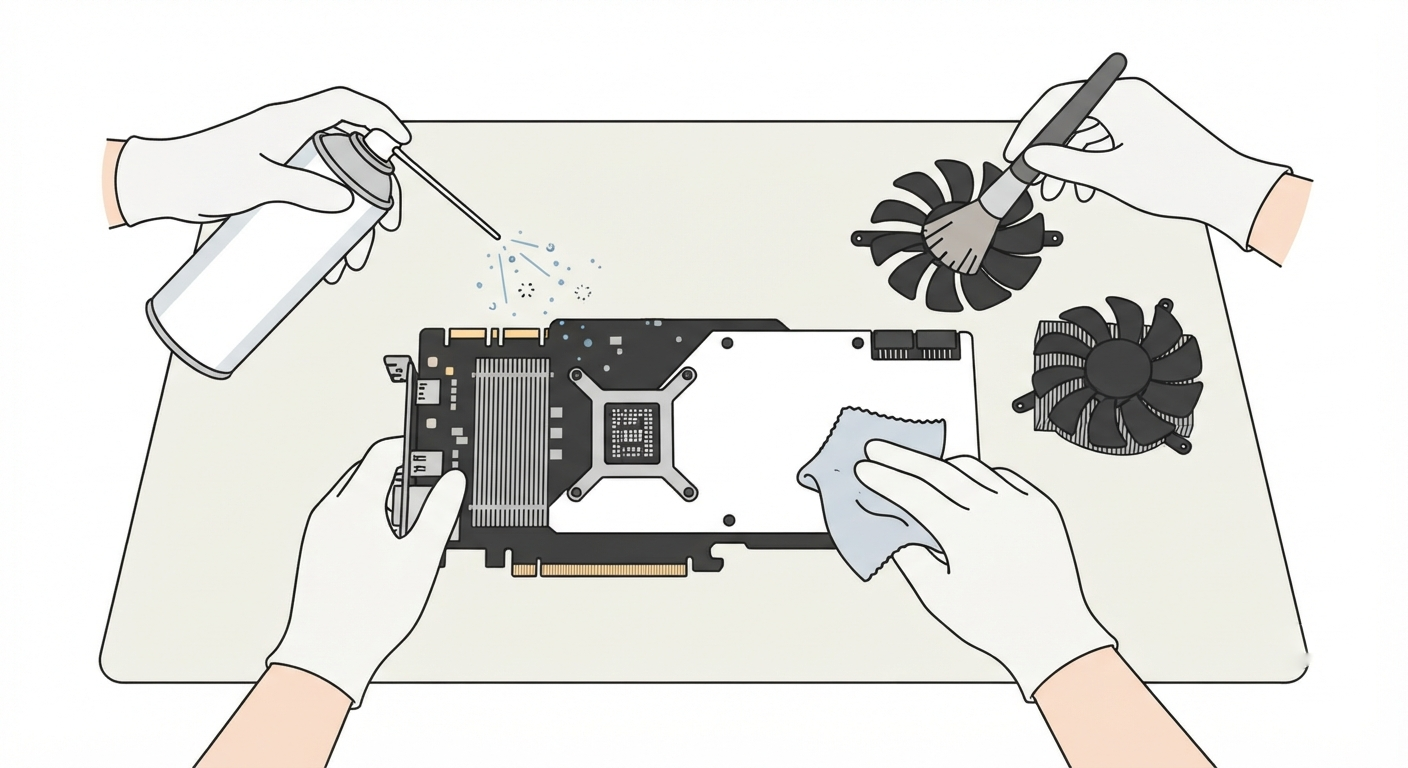
When dust has caked into the fins or the fans have not been cleaned in a long time, pulling the card out of the case gives much better access.
- Step 1: Disconnect all power cables running from the power supply to the graphics card, then unscrew the card from the case bracket and release the PCIe slot latch.
- Step 2: Gently lift the card straight out of the PCIe slot and set it on a flat, static-safe surface.
- Step 3: Blast compressed air through the heatsink fins from the back side, pushing dust out the direction it originally came in rather than deeper into the fins.
- Step 4: If the fans unscrew from the shroud, remove them to clean both sides of the blades and the heatsink fins underneath without any obstruction.
- Step 5: Dab a cloth lightly with isopropyl alcohol and wipe down the fan hubs, shroud, and backplate to lift any greasy residue that plain air will not remove.
- Step 6: Let all parts air dry fully before reassembling, then reinstall the fans, slot the card back into the PCIe slot, and reconnect the power cables.
Tip: A small zip-tie or twist-tie looped around a fan blade holds it steady better than a finger, freeing both hands for the compressed air can.
Common Problems and Fixes
Fans Still Sound Loud After Cleaning
If the fans are audibly clean but still noisy, the bearing itself may be worn out. A grinding or clicking sound that persists after dust removal usually points to bearing wear rather than dust, and replacement fans or a full cooler swap is the practical fix.
Card Not Detected After Reinstalling
This almost always traces back to the card not being fully seated in the PCIe slot or a power cable that was not clicked in securely. Reseating the card firmly and checking every power connector solves this in most cases.
Temperatures Still High Despite Visible Cleaning
Dust hiding deep inside tightly packed heatsink fins is easy to miss with a surface-level cleaning. Removing the card and blasting air through the fins from the back, as described above, usually clears out what a quick in-case cleaning left behind.
Streaks or Residue Left on the Shroud
This happens when a cloth is used with too much alcohol or without letting it evaporate fully. A lightly dampened cloth followed by a dry microfiber pass avoids streaking and keeps moisture away from any exposed electronics.
Frequently Asked Questions
How often should GPU fans and heatsink be cleaned?
Every three to six months is a reasonable schedule for most setups, though homes with pets or dusty environments may need cleaning closer to every two to three months.
Can compressed air damage GPU fans?
Compressed air itself is safe, but letting the fan blades spin freely at high speed from the air pressure can strain the bearings over time. Holding the blades still while spraying avoids this risk entirely.
Is it safe to use a vacuum cleaner on a GPU?
Using a vacuum directly on GPU components is not recommended, since it can generate static electricity that risks damaging sensitive parts. Compressed air paired with a soft brush is the safer approach.
Does cleaning the GPU require removing the heatsink from the die?
No. Routine dust cleaning only involves the fans, shroud, and the outer surface of the heatsink fins. Removing the heatsink from the actual GPU chip is a separate, more advanced task tied to reapplying thermal paste.
What are the signs a GPU needs cleaning?
Louder fan noise than usual, higher idle or load temperatures compared to before, and visible dust buildup on the shroud or fins are the clearest indicators that a cleaning is overdue.
Can isopropyl alcohol damage GPU components?
Isopropyl alcohol at 90 percent or higher is safe on plastic shrouds, metal fins, and backplates as long as it is applied sparingly and allowed to fully evaporate before power is restored to the system.
Should the fans be unscrewed during cleaning?
Unscrewing the fans is not required for routine dust removal, but it does make deeper cleanings more thorough by exposing both sides of the blades and the fins directly underneath them.
Will cleaning the GPU void the warranty?
External cleaning of the fans and shroud typically does not affect a warranty, but removing the heatsink from the GPU die often does. Checking the manufacturer’s warranty terms before going that far is worth the extra few minutes.
What should be done if the GPU still overheats after cleaning?
If temperatures remain high after a thorough cleaning, the thermal paste underneath the heatsink may have dried out and lost effectiveness. At that point, it may be time to consult a professional or an experienced technician rather than risk damaging the card further.
Can dust buildup actually damage a graphics card?
Left unchecked, heavy dust buildup traps heat against the components and forces the card to run hotter for longer periods, which accelerates wear on the fans and can shorten the card’s overall lifespan.
