
Learning how to switch between integrated and dedicated GPU settings gives a laptop or desktop better battery life, cooler running temperatures, or stronger gaming performance, depending on which chip is doing the work. Most modern systems with two graphics processors do not require any hardware changes to switch; the control lives entirely in software. This guide walks through every reliable method, from Windows settings to manufacturer control panels to BIOS toggles.
Key Takeaways
- Windows Graphics Settings lets any app be assigned to the integrated GPU or the dedicated GPU individually.
- NVIDIA Control Panel and AMD Software offer a global default plus per-application overrides for more precise control.
- Laptops with hybrid graphics (often called Optimus on NVIDIA systems or switchable graphics on AMD systems) switch automatically unless overridden manually.
- Desktop PCs with both an integrated GPU and a dedicated graphics card switch by changing which port the monitor is plugged into, sometimes combined with a BIOS setting.
- Forcing demanding games or creative software onto the dedicated GPU improves performance, while forcing everyday tasks onto the integrated GPU saves battery and reduces heat.
Before You Start
Switching between integrated and dedicated GPU settings is a software task on almost every system, so no disassembly or static precautions are needed. A few quick preparations make the process smoother.
- Update graphics drivers first, either through NVIDIA GeForce Experience, AMD Software, Intel Driver & Support Assistant, or Windows Update.
- Confirm which GPUs are actually installed by checking Windows Task Manager under the Performance tab.
- Close the application that needs to be reassigned before changing its GPU preference, since some changes only apply after a restart of that program.
Step-by-Step: How to Switch Between Integrated and Dedicated GPU
Method 1: Windows Graphics Settings (Per-App Control)
This is the most direct way to switch between integrated and dedicated GPU on a per-application basis, and it works the same way across NVIDIA, AMD, and Intel hardware combinations.
- Step 1: Open Settings, then go to System, then Display.
- Step 2: Scroll down and select Graphics (on older Windows 10 builds this may be under System > Display > Graphics settings).
- Step 3: Choose Desktop app or Microsoft Store app, then browse to or select the program that needs a specific GPU.
- Step 4: Click Options next to the app entry.
- Step 5: Select Power saving to force the integrated GPU, or High performance to force the dedicated GPU, then click Save.
- Step 6: Restart the application so the new setting takes effect.
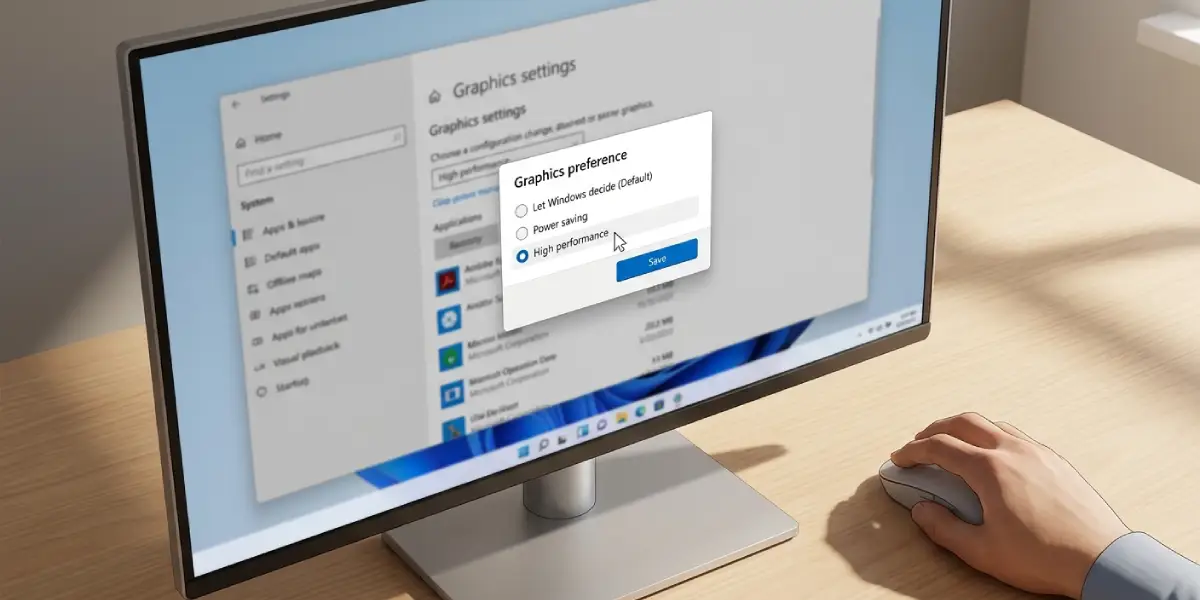
Tip: A quick way to check which GPU an app is actually using is to open Task Manager while the app is running, click the Performance tab, and look at the GPU usage graph under each listed graphics processor.
Method 2: NVIDIA Control Panel
- Step 1: Right-click the desktop and select NVIDIA Control Panel.
- Step 2: On the left side, choose Manage 3D settings.
- Step 3: For a global change, select the Global Settings tab and set Preferred graphics processor to either Integrated Graphics or High-performance NVIDIA processor.
- Step 4: For a single application, switch to the Program Settings tab, select the program from the list (or add it), and choose the preferred GPU for that program only.
- Step 5: Click Apply.
Method 3: AMD Software (Adrenalin)
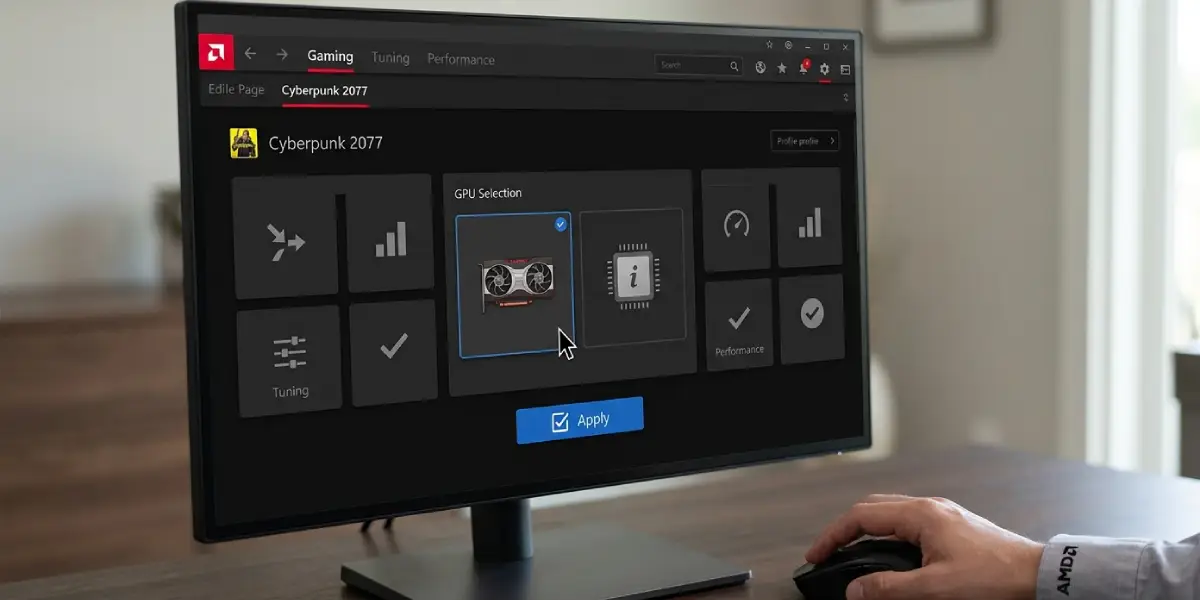
- Step 1: Right-click the desktop and open AMD Software.
- Step 2: Go to the Gaming tab and select the specific game or application, or use Global Graphics for a system-wide default.
- Step 3: Under Graphics Profile or Graphics Settings, choose either the integrated graphics or the dedicated AMD Radeon GPU.
- Step 4: Save the profile so it applies automatically the next time that application launches.
Method 4: Desktop PCs (Port and BIOS Switching)
Desktops with a motherboard that has integrated graphics output plus a separate dedicated graphics card switch differently, since it comes down to which physical port the display cable uses.
- Step 1: To use the dedicated GPU, plug the monitor cable into a port on the graphics card itself, usually located lower on the rear of the case.
- Step 2: To use the integrated GPU instead, move the cable to the video output port built into the motherboard’s rear I/O panel.
- Step 3: If the system does not detect the integrated GPU automatically, enter the BIOS or UEFI setup by pressing the manufacturer’s key (commonly Delete or F2) during startup.
- Step 4: Look for a setting labeled Primary Display, Initiate Graphics Adapter, or IGPU Multi-Monitor, and set it to enable the integrated GPU alongside the dedicated card.
- Step 5: Save changes and exit, then restart the PC with the cable connected to the desired port.
Tip: Keep the dedicated graphics card installed even when running on the integrated GPU, since removing it entirely can require another BIOS adjustment to restore integrated video output.
Common Problems and Fixes
- The app still uses the wrong GPU after changing the setting: Fully close the application from Task Manager rather than just closing the window, since some programs stay running in the background and ignore the new assignment until relaunched.
- No dedicated GPU option appears in Windows Graphics settings: This usually means the dedicated GPU driver is missing or outdated. Reinstall the driver directly from NVIDIA, AMD, or the laptop manufacturer’s support page.
- A laptop stays on the dedicated GPU constantly, draining the battery fast: Check the laptop manufacturer’s own utility (such as a vendor control center app), since some laptops have a separate hybrid graphics toggle that overrides Windows settings.
- No display output after moving the cable to a different port on a desktop: Confirm the BIOS setting for multi-adapter or integrated graphics is enabled, since some motherboards disable the integrated output automatically once a dedicated card is detected.
- A game still runs poorly even after being set to High performance: Confirm the correct dedicated GPU was selected if the system has more than one graphics option listed, and verify the graphics driver is current.
Frequently Asked Questions
What is the difference between an integrated GPU and a dedicated GPU?
An integrated GPU is built into the processor and shares system memory, making it efficient and cool-running but limited in performance. A dedicated GPU is a separate chip with its own memory, offering much stronger graphics performance at the cost of higher power use and heat.
Can every laptop switch between integrated and dedicated GPU?
Only laptops with hybrid graphics, meaning both an integrated GPU and a dedicated GPU installed together, support switching. A laptop with only one graphics processor has nothing to switch between.
Does switching to the integrated GPU improve battery life?
Yes. The integrated GPU uses significantly less power than a dedicated GPU, so running everyday tasks like browsing or document editing on it extends battery life noticeably.
Why does a game keep launching on the integrated GPU instead of the dedicated one?
This typically happens when Windows or the graphics control panel has no explicit rule for that game, so the system defaults to power saving. Manually assigning the game to the dedicated GPU through Windows Graphics settings or the manufacturer control panel resolves it.
Is it necessary to restart the computer after switching GPUs?
A full restart is not always required, but the affected application usually needs to be closed and reopened for the change to take effect.
Can switching GPUs damage a laptop or desktop?
No. Switching between integrated and dedicated GPU settings is a normal, safe software operation that manufacturers design the system to support.
Why does a monitor go black after plugging into a different port on a desktop?
This usually means the BIOS has not been set to allow both graphics outputs. Enabling the integrated graphics option in BIOS alongside the dedicated card typically fixes it.
Does using the dedicated GPU always mean better performance?
For demanding tasks like gaming, video editing, or 3D rendering, yes. For light tasks such as web browsing, the dedicated GPU offers no real benefit and simply uses more power and generates more heat.
How can someone tell which GPU is currently active for an app?
Opening Task Manager, selecting the Performance tab, and watching the GPU usage graphs while the app runs shows exactly which graphics processor is handling the workload.
