
Quick Answer: Press Windows key + R, type colorcpl, and press Enter to open Color Management. Go to the All Profiles tab to install an ICC file, then switch to the Devices tab, select the monitor, check “Use my settings for this device,” add the profile, and set it as default.
A color grade looks perfect on the editing monitor, then turns flat and shifted the moment it shows up on a phone or a client’s screen. The instinct is to blame the export settings or the editing software, but more often than not, the real cause is Windows quietly applying a generic sRGB profile instead of respecting the display’s actual calibration.
Tweaking the physical buttons on a monitor rarely solves it. Here’s the thing: the actual fix lives inside a built-in Windows tool called Color Management, which controls how the system reads and displays color for every connected screen. This guide covers opening that tool, installing a custom ICC profile, fixing washed-out colors, calibrating a display including HDR, handling multiple monitors, and resetting everything back to normal if something goes sideways.
What Is Color Management in Windows?
Color Management is the built-in feature responsible for how Windows reads and displays color across connected hardware, including monitors, printers, and scanners. Think of it as a translator sitting between a device and the screen, making sure colors show up the way they were actually intended.
That translation happens through ICC profiles, small files with the .icc or .icm extension that describe exactly how a specific device reproduces color. Windows uses this data to adjust what gets displayed, which is what keeps an image looking consistent between a screen and a printed page, or between two different monitors.
Every connected device gets a generic profile assigned automatically by default. That’s fine for casual browsing, but it’s rarely accurate. The key is recognizing the signs of a wrong profile before assuming something else is broken:
- Colors look dull, washed out, or unnaturally vivid
- The same photo looks different in a browser, in Photos, and in Photoshop
- Neutral grays carry a visible tint instead of looking truly gray
- HDR video looks blown out or strangely flat
- Two monitors side by side show noticeably different colors
- A printed photo doesn’t match what shows up on screen
How to Open Color Management in Windows 11
There’s more than one way to get there, but these four cover practically every situation, starting with the simplest.
Note: Recent Windows 11 updates removed Color Management from the Settings app’s search results. If hunting for it there leads nowhere, that’s expected — use any of the methods below instead.
Method 1: Search Box (Easiest)
- Press Windows key + S, or click the Search icon on the taskbar.
- Type color management.
- Click the result to open it.
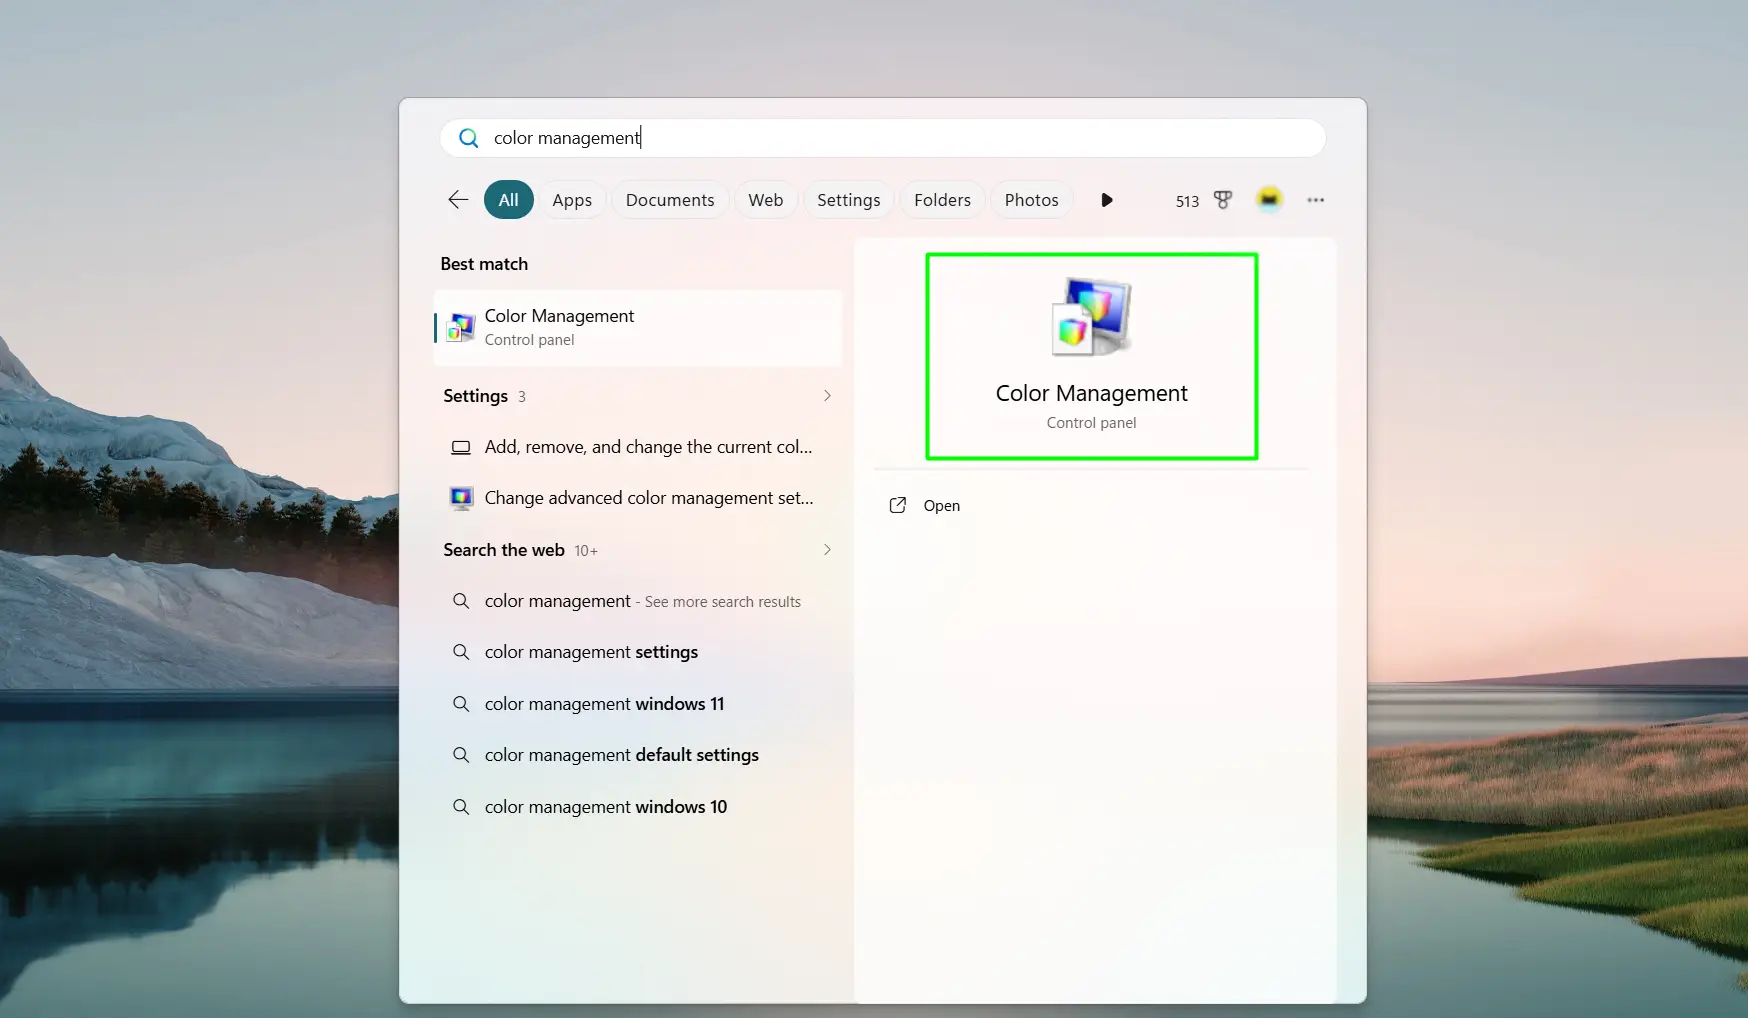
Method 2: Run Command (Fastest)
- Press Windows key + R.
- Type colorcpl and press Enter.
This is the most reliable method across every version of Windows 11, since it skips search indexing entirely.
Method 3: Control Panel
- Search for Control Panel in the Start menu.
- Set View by to Large icons or Small icons.
- Click Color Management.
Method 4: Desktop Shortcut (for frequent use)
- Right-click an empty spot on the desktop, hover over New, and select Shortcut.
- Enter C:\Windows\System32\colorcpl.exe in the location field and click Next.
- Name the shortcut and click Finish.
The Color Management window itself has three tabs: Devices, All Profiles, and Advanced. Everything from here on happens inside one of those three.
How to Install a Custom ICC Color Profile
ICC profiles usually come from a monitor manufacturer’s support page, or get generated by a hardware calibration tool like a colorimeter. Once that file is saved somewhere easy to find, installing it only takes a few clicks.
- Open Color Management and go to the All Profiles tab.
- Click Add.
- Browse to the saved .icc or .icm file, select it, and click Add again.
The profile now shows up in the installed list. Repeat for any additional profiles. Profile files can also be dropped directly into C:\Windows\System32\spool\drivers\color to make them available system-wide without touching the Add button at all.
How to Set a Custom Profile as the Default for a Monitor
Installing a profile doesn’t do anything on its own. It still needs to be assigned to a device and marked as the one Windows should actually use.
- Open Color Management and go to the Devices tab.
- Select the monitor from the Device dropdown. With multiple monitors connected, click Identify monitors first to confirm which is which.
- Check Use my settings for this device.
- Click Add, choose the profile, and click OK.
- Select that profile in the list and click Set as Default Profile.
- Click Close.
Worth double-checking later that it actually stuck — reopen Color Management and confirm the profile still shows (default) next to its name. Windows updates and new graphics drivers have a habit of quietly reverting this.
How to Fix Washed-Out or Oversaturated Colors
This is usually the actual reason anyone opens Color Management in the first place, and it’s fixable in a couple of minutes.
- Open Color Management and go to the Devices tab.
- Select the monitor, then check Use my settings for this device.
- Remove any profile that looks incorrect or unfamiliar.
- Click Add, select sRGB IEC61966-2.1, and click OK.
- Set it as the default profile and click Close.
sRGB is the right baseline for most standard monitors and should noticeably improve things right away. If colors still look off after that, the monitor manufacturer’s own ICC profile, downloaded from its support page, will usually outperform the generic sRGB fallback.
How to Calibrate Display Colors in Windows 11 and Windows 10
Windows includes a calibration wizard that walks through gamma, brightness, contrast, and color balance using visual comparisons. Most people find that running through it once makes a real, visible difference without spending anything on hardware.
- Open Settings with Windows key + I, then go to System and Display.
- Scroll down and click Color profile.
- Under Color calibration, click Calibrate display.
- Click Next and follow each on-screen comparison.
- Finish the wizard and save the result.
One step gets skipped constantly: after finishing, open Color Management, go to Advanced, click Change system defaults, and make sure Use Windows display calibration is turned on. Skip this and the calibration quietly stops applying after the next restart.
How to Calibrate HDR Display Settings in Windows 11
Monitors that support HDR get a separate calibration tool built specifically for HDR content, since the standard calibration above doesn’t cover tone mapping correctly.
- Open Settings, go to System, then Display.
- Scroll down and click HDR.
- Expand Display calibration for HDR video and click Calibrate.
- Follow the on-screen steps and adjust the slider based on what looks right.
- Close the full-screen video once finished.
If HDR content still looks wrong afterward, turning HDR off, running the standard calibration above, then turning HDR back on usually clears up any conflict between the two.
How to Manage Color Profiles Across Multiple Monitors
Two monitors rarely share the same panel, so they rarely need the same profile either. Each one gets configured separately.
- Open Color Management, go to Devices, and click Identify monitors to confirm which display is which.
- Select the first monitor from the Device dropdown, check Use my settings for this device, then add and set its correct profile.
- Switch the dropdown to the next monitor and repeat.
- Click Close once every display has its own profile assigned.
Using one identical profile across two different monitor models will not make them match. Each panel needs its own profile, sourced from that monitor’s manufacturer or generated by an actual calibration device.
How to Adjust Advanced Color Management Settings
Some software, including browsers, photo editors, and design tools, manages color on its own instead of relying on Windows. The Advanced tab controls how the system behaves underneath all of that.
- Open Color Management and click the Advanced tab.
- Review the current device and viewing-conditions profile under Windows Color System Defaults.
- Adjust the rendering intent settings for Graphics, Photos, or Video if the workflow calls for it.
- Click Change system defaults to apply changes for every user on the machine.
The key is keeping the working color space inside an app like Photoshop or Lightroom in sync with the display profile set here. Most editing software overrides Windows anyway, so the two need to agree.
How to Remove or Reset a Color Profile
Removing a profile and resetting color settings solve two different problems, so it helps to know which one actually applies.
To uninstall a profile completely:
- Open Color Management and click the All Profiles tab.
- Select the profile and click Remove.
- Confirm by clicking Continue.
To reset a single monitor back to the system default:
- Go to the Devices tab and select the monitor.
- Uncheck Use my settings for this device.
To reset color behavior for the entire system:
- Click the Advanced tab.
- Set Device profile, Default rendering intent, and the other listed options back to System default.
Tips for Managing Color Profiles
- Keep a backup copy of custom ICC files somewhere outside C:\Windows\System32\spool\drivers\color. A system reset or clean install wipes that folder, and re-downloading or re-generating a profile is more annoying than just having a copy saved.
- Recheck color settings after any major Windows update or graphics driver install. Both are known to quietly reset profile assignments back to default.
- Skip Color Management entirely if the goal is just a different accent color or theme. That setting lives under Personalization, then Colors, completely separate from anything covered here.
- Hardware calibration tools, like colorimeters, beat the built-in wizard every time for serious photo, video, or print work. The wizard relies on the eye, which is good enough for casual use but not for paid output.
- Graphics card software like NVIDIA or AMD’s control panel can apply its own color adjustments on top of Windows. If colors still look off after fixing the ICC profile, check there next.
Frequently Asked Questions
How do you open Color Management in Windows 11 or Windows 10?
Press Windows key + R, type colorcpl, and press Enter. That’s the fastest, most reliable way on any version. Searching “color management” through the taskbar Search icon, or finding it under Control Panel’s Large icons view, both work too.
Why can’t Color Management be found in Windows 11 Settings?
Recent Windows 11 updates removed it from the Settings app’s search index, even though the tool itself still works fine. Use the Run command, colorcpl, instead of searching inside Settings.
How do you fix washed-out or oversaturated colors on a Windows monitor?
Open Color Management, select the monitor under the Devices tab, remove any incorrect profile, then add and set sRGB IEC61966-2.1 as the default. If that’s not accurate enough, swap in the ICC profile specific to the monitor model from the manufacturer’s website.
What is an ICC profile and where can one be downloaded?
An ICC profile, with a .icc or .icm extension, is a small file describing exactly how a device reproduces color. Monitor manufacturers post these on their support pages under the specific model number, and hardware colorimeters can generate a custom one by measuring the actual screen.
Why do two monitors show different colors on the same PC?
Different monitor models almost never share identical panels, so a generic or mismatched profile makes the gap obvious. Assigning each monitor its own correct ICC profile under the Devices tab is what brings them back in line.
Do NVIDIA or AMD graphics settings interfere with Color Management?
Yes, sometimes. Digital vibrance, saturation sliders, and similar settings inside a graphics card’s control panel sit on top of whatever Windows is doing, and can fight with a correctly assigned ICC profile. Worth checking there if colors still look wrong after fixing the profile in Windows.
Does a Windows or graphics driver update reset color profile settings?
Often, yes. Both major feature updates and new graphics drivers can quietly revert a monitor back to its default profile. After installing either, reopen Color Management and confirm the correct profile still shows as default.
Is hardware calibration worth it over the built-in Windows calibration tool?
For paid photo, video, or print work, yes. A colorimeter measures actual light output and builds a precise profile. The built-in wizard relies on visual judgment, which is good enough for casual use but not accurate enough for professional color matching.
Why do colors look different between apps on the same screen?
Some software, like web browsers and professional photo editors, manages color through its own internal engine instead of relying on the Windows system profile. That’s why the same image can look slightly different in a browser versus Photoshop versus the Photos app.
Will a custom color profile help printed photos match the screen?
It helps significantly, since accurate display colors are half of the equation. For the closest match, the printer also needs its own correct ICC profile assigned under Color Management’s Devices tab, alongside the monitor’s.
