
Setting up a Comcast/Xfinity email account in Outlook for Mac only takes a few minutes once the right server settings are in place. This guide walks through the exact steps needed to get Xfinity email syncing correctly with Outlook for Mac, without the login loops or ‘password incorrect’ errors that trip up so many users.
Key Takeaways
- Third-party email access must be turned on inside the Xfinity Email website before Outlook can connect.
- Xfinity email works with Outlook for Mac through IMAP, not POP, which keeps mail synced across devices.
- The incoming server is imap.comcast.net (port 993, SSL) and the outgoing server is smtp.comcast.net (port 587 or 465).
- Outlook sometimes needs manual server entry instead of relying on auto-detect.
- A repeated password prompt almost always points back to third-party access being switched off.
How to Add a Comcast/Xfinity Email Account in Outlook for Mac
Method 1: Turn On Third-Party Access in Xfinity Email
- Step 1: Sign in to the Xfinity Email website using a Comcast.net or Xfinity.com account.
- Step 2: Open the gear icon in the upper right corner and select ‘Settings’.
- Step 3: Go to the ‘Security’ section and locate ‘Third Party Access Security’.
- Step 4: Toggle the setting to allow access from third-party email programs, then save the change.
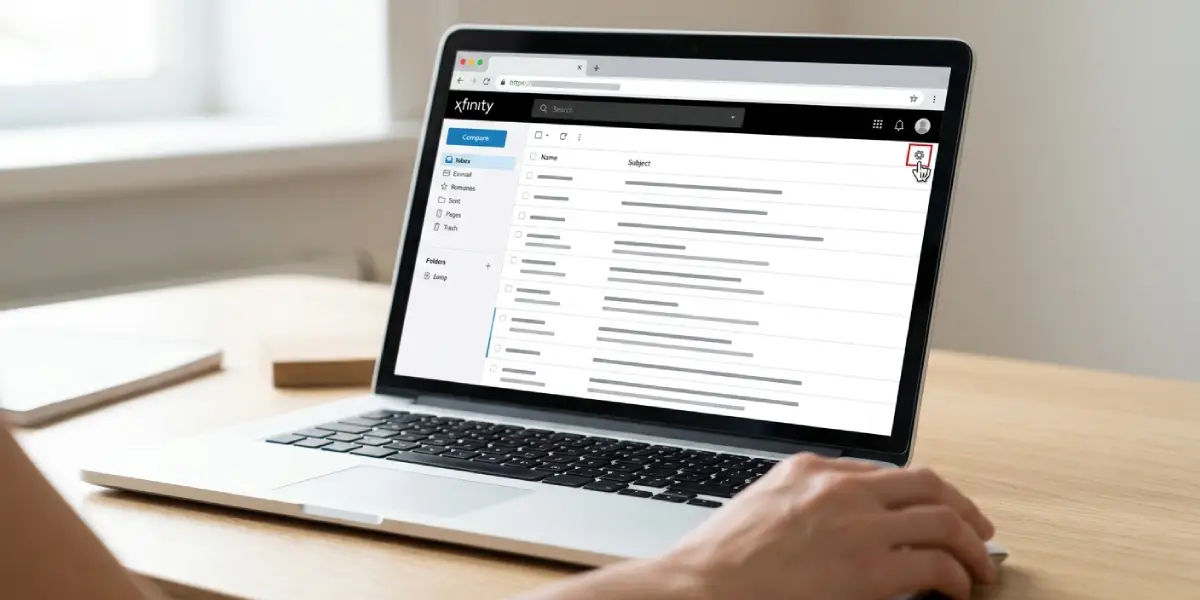
Tip: This step gets skipped more often than any other, and it is the single most common reason Outlook rejects a correct password later on.
Method 2: Open Outlook for Mac and Start Adding the Account
- Step 5: Open Outlook for Mac and click ‘Outlook’ in the top menu bar, then choose ‘Settings’.
- Step 6: Select ‘Accounts’, then click the plus sign in the lower left corner and choose ‘New Account’.
- Step 7: Type the full Comcast or Xfinity email address (for example, name@comcast.net) and click ‘Continue’.
Method 3: Enter the Server Settings Manually
Outlook will usually try to auto-detect the account type first. If it does not configure automatically, or if the login fails, switch to manual setup using these details.
- Step 8: Choose ‘IMAP’ as the account type when prompted.
- Step 9: For the incoming mail server, enter imap.comcast.net, set the port to 993, and make sure SSL is enabled.
- Step 10: For the outgoing mail server, enter smtp.comcast.net, set the port to 587 with STARTTLS (or 465 with SSL), and confirm that authentication is required.
- Step 11: Enter the full email address as the username, then type the account password.
- Step 12: Click ‘Add Account’ or ‘Sign In’ to complete the connection.
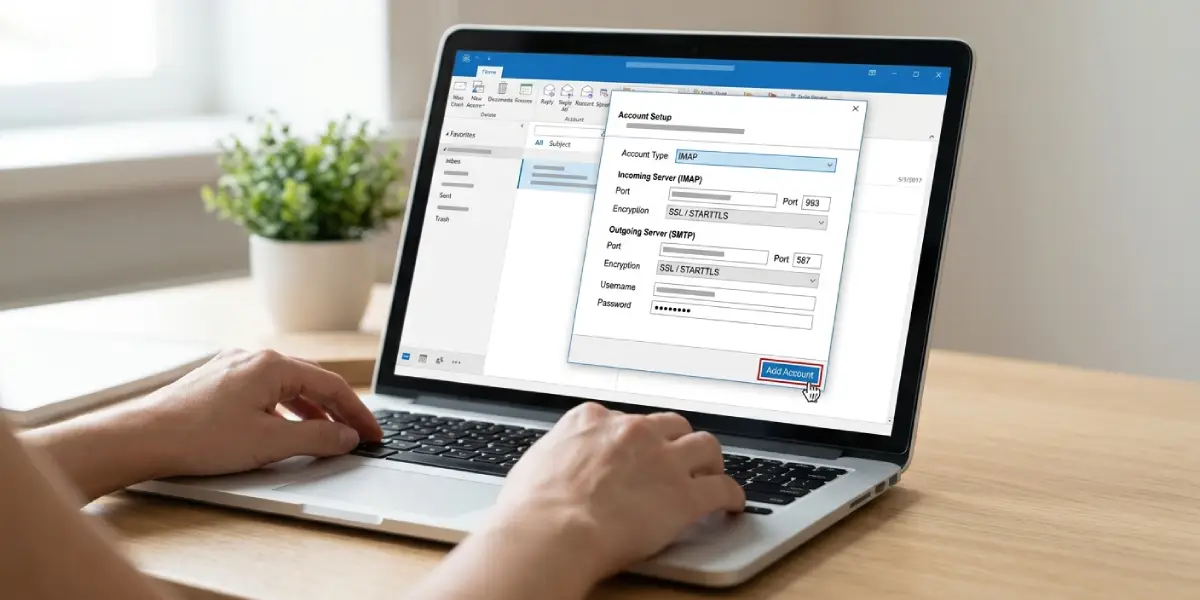
Tip: Always type the full email address, including @comcast.net, as the username. A shortened username is a common cause of authentication failures.
Method 4: Confirm the Account Is Syncing
- Step 13: Once Outlook finishes adding the account, click ‘Done’ to return to the main inbox view.
- Step 14: Watch the sidebar for the new Xfinity account and give it a minute or two to pull down existing folders and messages.
- Step 15: Send a short test email to another address to confirm outgoing mail is working as well.
Common Problems and Fixes
- Outlook keeps asking for a password on repeat. This almost always traces back to third-party access being disabled on the Xfinity Email website. Turning it on and restarting Outlook usually resolves it right away.
- Auto-detect fails to find the account. Cancel the automatic setup and re-enter the account using the manual IMAP settings listed in Step 3 above.
- Outgoing mail bounces or gets stuck in the outbox. Double-check that the SMTP port matches the encryption method: 587 pairs with STARTTLS, while 465 pairs with SSL. Mismatched pairs are a frequent cause of stuck outgoing mail.
- Old emails are missing after setup. IMAP syncs gradually rather than all at once. Leaving Outlook open and connected to the internet for a while usually brings older folders into view.
- Connection times out during setup. A temporary network hiccup or an outdated macOS version can interrupt the handshake. Confirm the Mac’s internet connection is stable and that Outlook is updated to the latest version before trying again.
Frequently Asked Questions
Does Xfinity email use IMAP or POP in Outlook for Mac?
Xfinity email works with Outlook for Mac through IMAP. IMAP keeps messages synced across every device signed into the account, which is why it is the recommended setup rather than POP.
What is the correct incoming mail server for Xfinity email?
The incoming IMAP server is imap.comcast.net, using port 993 with SSL enabled.
What is the correct outgoing mail server for Xfinity email?
The outgoing SMTP server is smtp.comcast.net. Port 587 with STARTTLS is the standard choice, though port 465 with SSL also works.
Why does Outlook keep rejecting the correct Xfinity password?
This usually happens because third-party access has not been enabled in the Xfinity Email website settings. Turning that setting on typically fixes the login issue within a few minutes.
Is a separate app password required for Xfinity email in Outlook?
No separate app password is required. The regular Xfinity account password works, as long as third-party access has been enabled first.
Can more than one Xfinity email address be added to the same Outlook for Mac profile?
Yes. Repeating the account setup steps for each address adds multiple Xfinity accounts to the same Outlook for Mac profile, and each one appears as a separate entry in the sidebar.
Why are old emails not showing up right after setup?
IMAP downloads folders and messages gradually rather than all at once. Keeping Outlook open and connected for a short while usually brings the rest of the mailbox into view.
Does the Mac need to be updated before adding an Xfinity account?
Keeping macOS and Outlook updated to their latest versions helps avoid connection errors during setup, since outdated software can sometimes interrupt the secure handshake with Xfinity’s servers.
What should be done if Outlook cannot auto-detect the Xfinity account?
Switching to manual setup and entering the IMAP and SMTP details directly, as outlined in the step-by-step guide above, resolves this in most cases.
