
Learning how to enable or disable a laptop touchpad comes in handy more often than most people expect, whether an external mouse keeps getting bumped by a stray palm or the touchpad has started acting up on its own. This guide walks through every reliable method, from a simple keyboard shortcut to deeper settings buried in Windows and the BIOS.
Key Takeaways
- Most laptops have a dedicated function key shortcut that toggles the touchpad instantly.
- Windows Settings and Device Manager both offer a more permanent way to enable or disable the touchpad.
- Many laptops automatically disable the touchpad the moment an external mouse is plugged in, which can be turned off if unwanted.
- BIOS or UEFI settings can disable the touchpad at a hardware level, useful for troubleshooting or corporate deployments.
- If the touchpad refuses to respond after any of these changes, outdated or corrupted drivers are almost always the culprit.
Method 1: Use the Function Key Shortcut
This is the fastest way to enable or disable the touchpad, and it works independently of whatever operating system happens to be running. Laptop manufacturers place a small touchpad icon on one of the function keys, often F5, F6, F7, or F9, though the exact key varies by brand and model.
- Step 1: Look along the top row of the keyboard for a key with a touchpad icon, usually a small rectangle with an X or a line through it.
- Step 2: Press that key alone, or hold the ‘Fn’ key and press it together, depending on how the laptop’s function key behavior is configured.
- Step 3: Watch for an on-screen notification confirming the touchpad has been enabled or disabled.
- Step 4: Test the touchpad by moving a finger across the surface to confirm the change took effect.

Tip: If pressing the key does nothing, check whether the laptop’s function keys are set to ‘media mode’ by default in the BIOS. Toggling the ‘Fn Lock’ key, if the keyboard has one, often fixes this instantly.
Method 2: Enable or Disable the Touchpad in Windows Settings
Windows includes a built-in toggle that works well for anyone who wants a straightforward, software-level way to enable or disable the laptop touchpad without hunting for a function key combination.
- Step 1: Open the Start menu and click the gear icon to launch Settings.
- Step 2: Select ‘Bluetooth & devices’, then click ‘Touchpad’.
- Step 3: Use the toggle switch at the top of the page to turn the touchpad on or off.
- Step 4: Scroll down to adjust sensitivity, scrolling direction, or gesture options if the touchpad is being kept enabled.
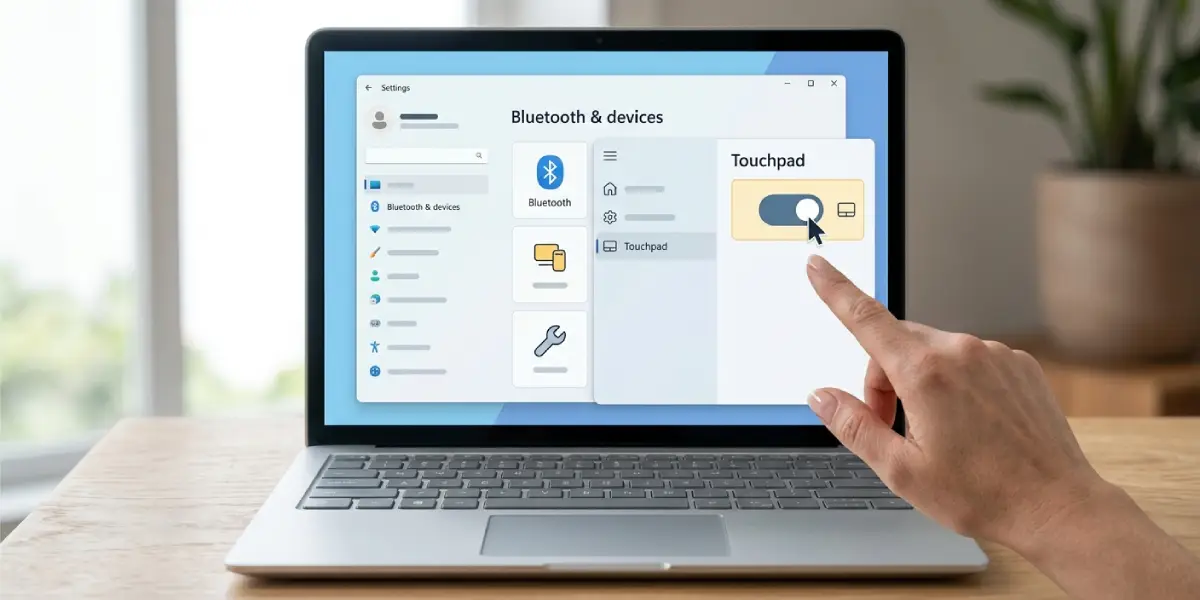
This method is particularly useful for anyone who prefers a visual confirmation rather than relying on a keyboard icon that can be hard to spot in dim lighting.
Automatically Disable the Touchpad When a Mouse Is Connected
On the same Touchpad settings page, a setting labeled something like ‘Leave touchpad on when a mouse is connected’ can be switched off. Doing so tells Windows to disable the touchpad automatically the instant an external mouse is plugged in or paired over Bluetooth, which prevents accidental cursor jumps while typing.
Method 3: Use Device Manager
Device Manager offers a more forceful disable option, useful when the touchpad needs to stay off system-wide, even across reboots, until it is manually turned back on.
- Step 1: Right-click the Start button and choose ‘Device Manager’.
- Step 2: Expand the ‘Mice and other pointing devices’ category.
- Step 3: Right-click the entry that represents the touchpad, often labeled with the manufacturer’s name or as a ‘HID-compliant touchpad’.
- Step 4: Select ‘Disable device’ to turn it off, or ‘Enable device’ if it currently shows as disabled.
Tip: If more than one entry appears under that category, disable one at a time and test the touchpad after each change to identify the correct device without accidentally disabling the mouse pointer driver entirely.
Method 4: Disable the Touchpad in BIOS or UEFI
Disabling the touchpad at the BIOS level turns it off before the operating system even loads, which is helpful for troubleshooting a touchpad that behaves erratically during startup or for IT departments standardizing a fleet of laptops.
- Step 1: Restart the laptop and press the BIOS entry key repeatedly during boot, commonly F2, F10, F12, or Delete depending on the manufacturer.
- Step 2: Navigate to the ‘Advanced’ or ‘Devices’ tab using the arrow keys.
- Step 3: Locate the entry labeled ‘Internal Pointing Device’ or ‘Touchpad’ and change it to disabled.
- Step 4: Save changes, usually with F10, and allow the laptop to restart normally.
This method sits a level above software toggles, so it is worth remembering the exact steps taken in case the touchpad needs to be switched back on later through the same menu.
Common Problems and Fixes
- Touchpad still works after being disabled in Windows: A leftover manufacturer utility, such as a Synaptics or Elan control panel, may be overriding the Windows setting. Check the system tray or the manufacturer’s touchpad app and disable it from there as well.
- Function key shortcut stopped working: This usually points to an outdated or missing keyboard driver. Updating the chipset and keyboard drivers through the manufacturer’s support page typically restores the shortcut.
- Touchpad won’t re-enable after BIOS disable: Return to the same BIOS menu used to disable it and switch the setting back, since software toggles cannot override a BIOS-level disable.
- Touchpad re-enables itself after every restart: Some manufacturer utilities reset preferences on boot. Look for an ‘auto-start’ or ‘restore settings’ option inside that utility and turn it off.
- Cursor jumps around even with the touchpad disabled: This points to a separate issue, often a stuck key or a failing trackpoint if the laptop has one, rather than the touchpad itself.
Frequently Asked Questions
Why does the touchpad shortcut key not do anything on some laptops?
Some models require holding the ‘Fn’ key alongside the touchpad icon key, while others use it as a standalone key. Checking the laptop’s keyboard layout diagram in its manual clarifies which method applies.
Can the touchpad be disabled without affecting the keyboard?
Yes. All the methods described here, including Device Manager and BIOS, target only the touchpad hardware and have no effect on the keyboard.
Is it safe to disable the touchpad through Device Manager?
Yes, disabling a device through Device Manager is fully reversible and does not risk any hardware damage.
Why does the touchpad turn back on after Windows updates?
Windows updates occasionally reset driver settings to default. Reapplying the Settings app toggle or the Device Manager disable after a major update usually resolves this.
Does disabling the touchpad save battery life?
The touchpad draws a very small amount of power, so disabling it produces no noticeable difference in battery life.
What is the difference between disabling the touchpad in Settings versus BIOS?
The Settings app disables the touchpad within Windows only, while a BIOS-level disable turns it off before the operating system loads, meaning it stays off even in a different operating system or boot environment.
Can gestures like two-finger scrolling be turned off without disabling the whole touchpad?
Yes. The Touchpad settings page in Windows allows individual gestures to be turned off while leaving basic cursor movement active.
Why does the touchpad stop working correctly after re-enabling it?
This is often caused by a driver that failed to reload properly. Restarting the laptop, or updating the touchpad driver from the manufacturer’s support page, typically fixes the issue.
Does every laptop have a BIOS option to disable the touchpad?
Not every model includes this option. Budget and older laptops sometimes omit a BIOS-level toggle, leaving Windows Settings or Device Manager as the only available methods.
