
Learning how to fix a cracked laptop screen starts with understanding that most physical screen damage cannot be repaired, only replaced, and this guide walks through the entire process from diagnosis to installation. A cracked panel almost always means the LCD or OLED layer itself has been physically damaged, and no amount of software tweaking or gentle pressure will undo that. The good news is that replacing a laptop screen is one of the more approachable repairs a determined user can handle at home with the right tools and patience.
Key Takeaways
- A cracked laptop screen almost always requires a full panel replacement, not a repair of the existing glass or LCD.
- The exact model number and panel part number must be confirmed before ordering a replacement screen.
- Most modern laptops use ribbon cables and light adhesive rather than heavy screws, which makes the swap manageable with basic tools.
- Static discharge and careless prying are the two most common causes of a failed screen replacement.
- If the laptop shows signs of internal damage beyond the screen, such as a cracked motherboard or damaged hinge assembly, professional repair is the safer route.
Before You Start
A little preparation prevents most of the mistakes that turn a simple screen swap into a bigger repair job. Before touching any screws or cables, take care of the basics.
- Power off the laptop completely and unplug the charger.
- Remove the battery if the model allows for easy battery removal, or disconnect the internal battery connector once the back panel is open.
- Discharge static electricity by touching a bare metal surface or wearing an anti-static wrist strap.
- Work on a clean, well-lit, flat surface with enough room to lay the screen down safely.
- Let the laptop cool down fully if it was recently in use, since some components sit close to the display hinge.
Tip: Take a photo of the screen and hinge area before removing anything. It becomes a useful reference when reconnecting cables later.
Opening a laptop chassis can affect the manufacturer’s warranty, so it is worth checking coverage status first. If the laptop is still under warranty, or if the damage extends to the chassis, motherboard, or hinge hardware, it is usually smarter to let a professional handle the repair rather than risk voiding coverage or causing further damage.
Tools and Materials Needed
- A replacement LCD or OLED panel matching the exact model and part number
- A precision screwdriver set with Phillips and Torx bits
- Plastic pry tools or a spudger
- Tweezers for handling small ribbon cable connectors
- An anti-static wrist strap or mat
- A lint-free or microfiber cloth
- Isopropyl alcohol at 90 percent or higher, for cleaning adhesive residue
- A small parts tray or magnetic mat to keep screws organized
How to Fix a Cracked Laptop Screen Step by Step
Identifying the Correct Replacement Panel
The first job is confirming exactly which panel the laptop needs, since screens vary by resolution, connector type, touch capability, and even panel technology between otherwise identical-looking models.
- Step 1: Locate the laptop’s exact model number, usually found on the bottom of the chassis or in the system information settings if the display still shows an image.
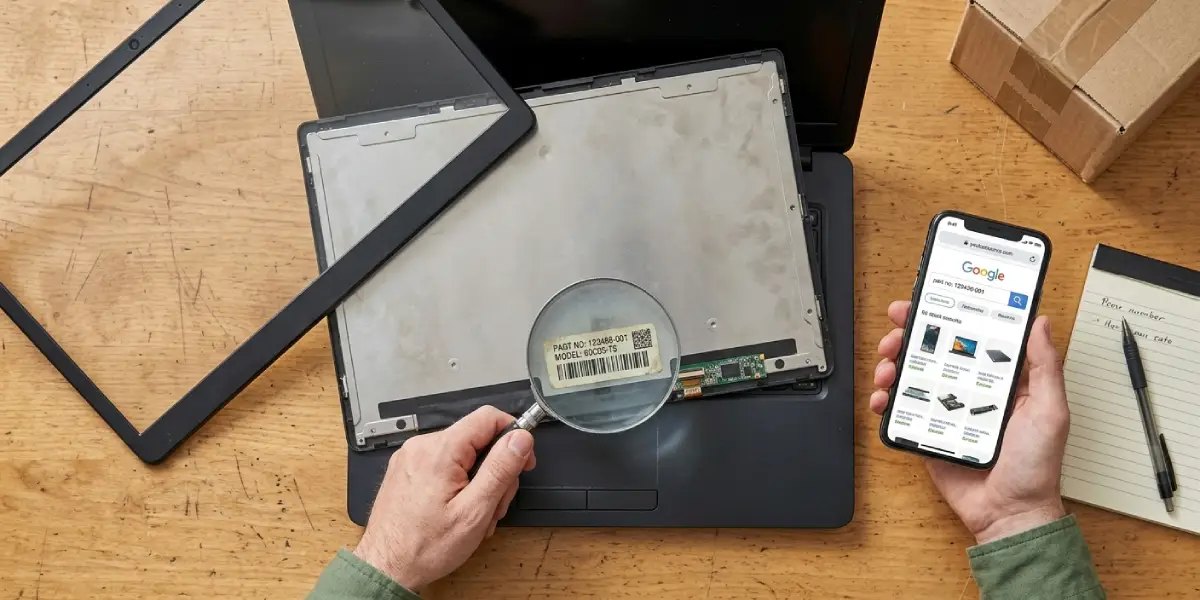
- Step 2: Check for a part number printed on a small sticker on the back of the current screen, if it is accessible without full disassembly.
- Step 3: Confirm resolution, panel type, and connector style before ordering, since two laptops with the same model name sometimes ship with different panel suppliers.
Removing the Damaged Screen
- Step 4: Remove the bezel screws, which are often hidden under small rubber or plastic covers along the edges of the screen frame.
- Step 5: Use a plastic pry tool to gently separate the bezel from the display housing, working slowly around the edges rather than forcing one section.
- Step 6: Once the bezel is off, remove the screws securing the panel to the lid, then carefully lift the panel forward, keeping the ribbon cable in mind so it does not stretch.
- Step 7: Peel back the tape covering the video cable connector, then gently disconnect it by lifting the connector straight up rather than pulling at an angle.
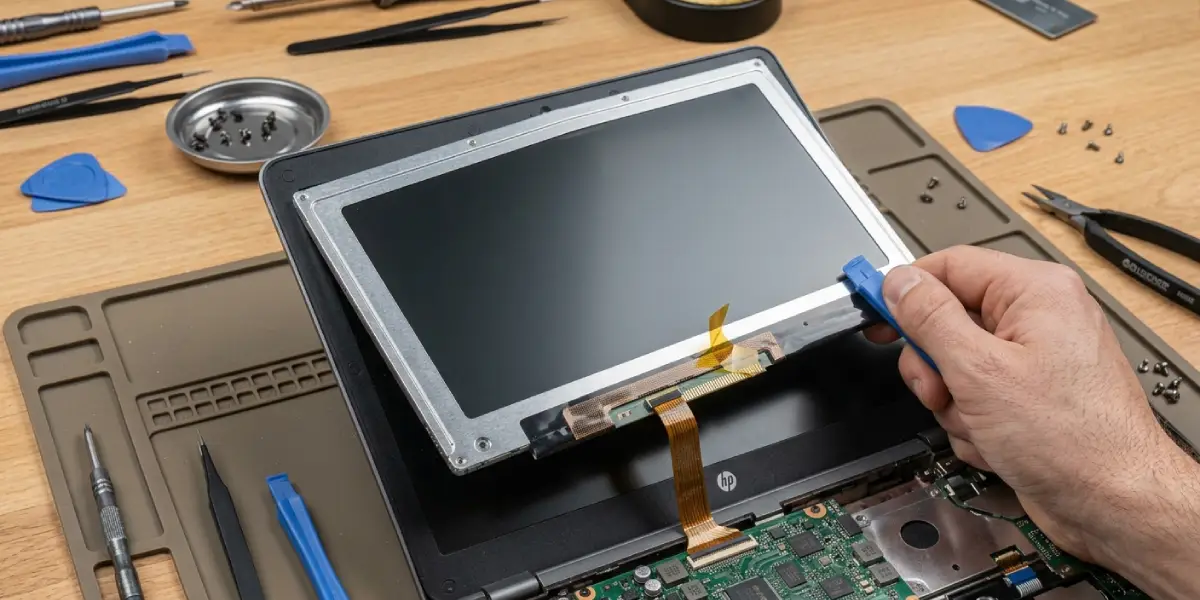
Tip: Many panels use adhesive strips along the top edge instead of screws. Warming the area slightly with a hairdryer on low heat can loosen stubborn adhesive without damaging the panel underneath.
Installing the New Screen
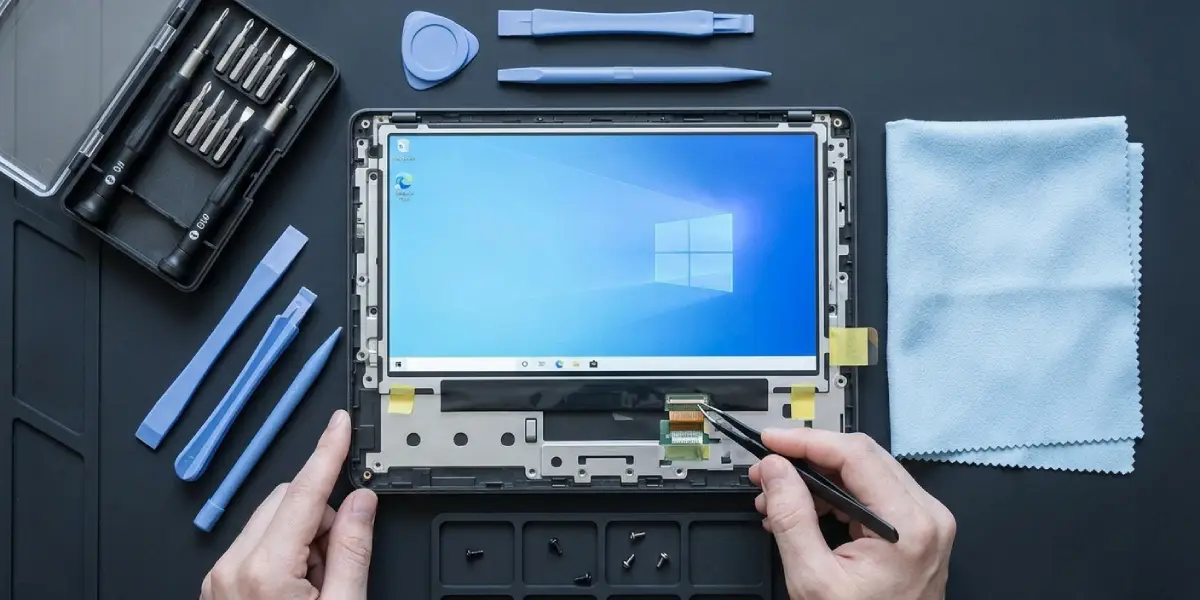
- Step 8: Connect the video cable to the new panel first, making sure the connector seats fully and the retention tape is pressed down securely.
- Step 9: Position the new panel into the lid, aligning the mounting holes before securing any screws.
- Step 10: Reattach the bezel, pressing gently along the edges until the clips snap back into place evenly.
- Step 11: Reconnect the battery, then power on the laptop before fully closing everything up, to confirm the new screen displays correctly.
- Step 12: Once the display is confirmed working, finish reinstalling any remaining screws and covers.
Common Problems and Fixes
The New Screen Shows No Image
This is usually a connector issue rather than a defective panel. Reopen the bezel and check that the video cable is fully seated, since even a slightly loose connection can result in a completely blank display.
Lines or Discoloration Appear on the New Panel
Vertical or horizontal lines after installation often point to a pinched or damaged ribbon cable during assembly. Inspect the cable path for sharp bends or pinch points near the hinge.
The Screen Flickers Intermittently
Flickering after a fresh install is frequently caused by a connector that is seated but not fully locked. Reseating the cable and pressing the retention tape down firmly usually resolves it.
The Bezel Does Not Sit Flush
This typically means a clip was missed during reassembly or a cable is caught underneath the frame. Remove the bezel again and check that no wiring is trapped along the edges before reattaching.
Backlight Works But the Image Is Very Dim
A dim but functioning backlight can point to a wrong panel variant being installed, particularly if the replacement uses a different backlight technology than the original. Double-checking the part number against the original panel prevents this mismatch.
Frequently Asked Questions
Can a cracked laptop screen be repaired without replacing it?
No. Once the LCD or OLED layer is physically cracked, the damage is permanent, and replacement is the only real fix.
How much does it cost to fix a cracked laptop screen?
Cost varies widely depending on the laptop model and panel type, since prices depend on the specific replacement part required for that device.
Is it safe to keep using a laptop with a cracked screen?
Light cracks that do not affect visibility can often be used temporarily, but continued use risks further cracking or damage to internal display layers, so replacement sooner is generally safer.
Can external damage from a crack affect other laptop components?
In most cases the damage stays contained to the display panel, but a severe impact can sometimes affect the hinge, webcam, or internal wiring, which is worth inspecting during replacement.
How long does a laptop screen replacement take?
For most laptops, the physical swap takes under an hour once the correct panel is in hand and the workspace is prepared.
Do all laptop screens use the same connector type?
No. Connector types vary between manufacturers and even between models from the same brand, which is why confirming the exact part number matters before ordering.
Can a touchscreen laptop use a non-touch replacement panel?
No. Touch and non-touch panels use different hardware, and installing the wrong type will result in a screen that displays an image but has no touch function.
What should be done if the new screen still does not work after installation?
Recheck the video cable connection first, since a loose or misaligned connector is the most common cause of a non-working replacement panel.
Is it worth attempting this repair at home instead of using a professional service?
For most standard laptops, a home repair is manageable with patience and the right tools, though laptops with unusual hinge designs or extensive internal damage are often better left to a professional.
Does replacing a laptop screen void the warranty?
If the laptop is still under manufacturer warranty, opening the chassis can void that coverage, so checking warranty status before starting is worthwhile.
