
Learning how to replace a laptop screen is one of the most practical repair skills a laptop owner can pick up, especially when a cracked panel or dead backlight turns a working machine into an expensive paperweight. With the right tools, a steady hand, and about an hour of focused work, most people can swap a damaged display without sending the laptop out for repair.
Key Takeaways
- Replacing a laptop screen involves removing the bezel, disconnecting the video cable, swapping the panel, and reassembling everything in reverse.
- The exact screen model number matters more than anything else – matching connector type, resolution, and panel size prevents compatibility headaches.
- Static discharge, careful cable handling, and patience with adhesive or clips are the biggest factors separating a clean repair from a cracked bezel.
- Most standard laptop screen replacements take 30 to 60 minutes once the correct part is on hand.
- A loose cable connection is the most common cause of a blank or flickering screen after reassembly.
Before You Start
Preparation makes the difference between a smooth screen swap and a frustrating one. Power the laptop down completely and unplug the charger, then remove the battery if it is user-removable. For laptops with internal batteries, disconnect the battery connector from the motherboard once the bottom panel is off, since this prevents any accidental power surge to the display circuitry while working. Discharge static electricity by touching a bare metal surface or wearing an anti-static wrist strap, and let the machine sit for a few minutes if it was recently running warm.
Tools and Materials Needed
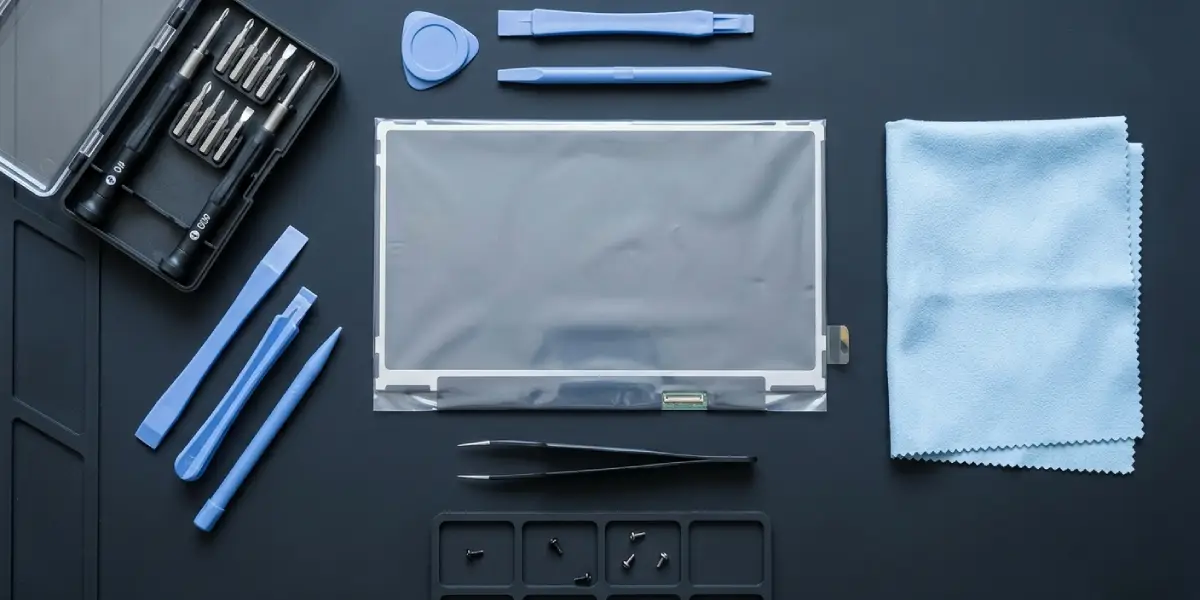
- Precision screwdriver set (Phillips #0 and #00, plus any Torx bits the laptop requires)
- Plastic pry tools or an opening spudger
- Replacement LCD or LED screen matching the exact model number of the original
- Tweezers for handling small connectors and ribbon cables
- A small container or magnetic mat to keep screws organized
- Microfiber cloth for handling the new panel without leaving fingerprints or smudges
Tip: Before ordering a replacement, remove the small sticker on the back of the original screen or check the laptop’s service manual to confirm the exact panel part number. A screen that looks identical can still have a different connector pinout.
If the laptop is still under warranty, or if the display cable routes through a hinge assembly that looks unusually delicate, it is worth pausing and letting a certified repair technician handle the job. Opening the case will typically void any remaining manufacturer warranty, so weigh that against the cost of a professional repair before starting.
How to Replace a Laptop Screen
- Step 1: Place the laptop screen-down on a soft, clean surface and remove the rubber or plastic screw covers along the bottom edge of the bezel, then remove all visible screws holding the bottom panel in place.
- Step 2: Lift off the bottom panel using a plastic pry tool, working slowly around the edges to release any clips without cracking the plastic.
- Step 3: Disconnect the battery connector from the motherboard if it was not already removed, then wait a few seconds before touching any other components.
- Step 4: Open the laptop and locate the screws or adhesive strips holding the bezel around the screen. Gently pry the bezel free starting at a corner, working around the perimeter until it lifts away.
- Step 5: With the bezel removed, locate the screws securing the screen to the lid, usually two or four along the sides. Remove them and support the panel with one hand so it does not fall forward.
- Step 6: Tilt the screen forward carefully to expose the video cable connector on the back. Peel back any tape covering it, then gently disconnect the cable by pulling the connector straight out, never yanking on the cable itself.
- Step 7: Set the old screen aside and connect the video cable to the new panel, pressing the connector in firmly until it seats. Reapply any tape that was covering the original connector.
- Step 8: Before fully reassembling, connect the battery and power on the laptop briefly to confirm the new screen displays an image correctly. This quick test saves the trouble of disassembling everything again if a connection needs adjusting.
- Step 9: Once confirmed working, power down, reconnect the battery if disconnected, and position the new screen into the lid. Replace the mounting screws.
- Step 10: Snap the bezel back into place, starting from the top and working around the edges, pressing firmly until all clips click in. Reinstall bezel screws if the model uses them.
- Step 11: Close the laptop, flip it over, and reattach the bottom panel, replacing all screws and screw covers in their original positions.
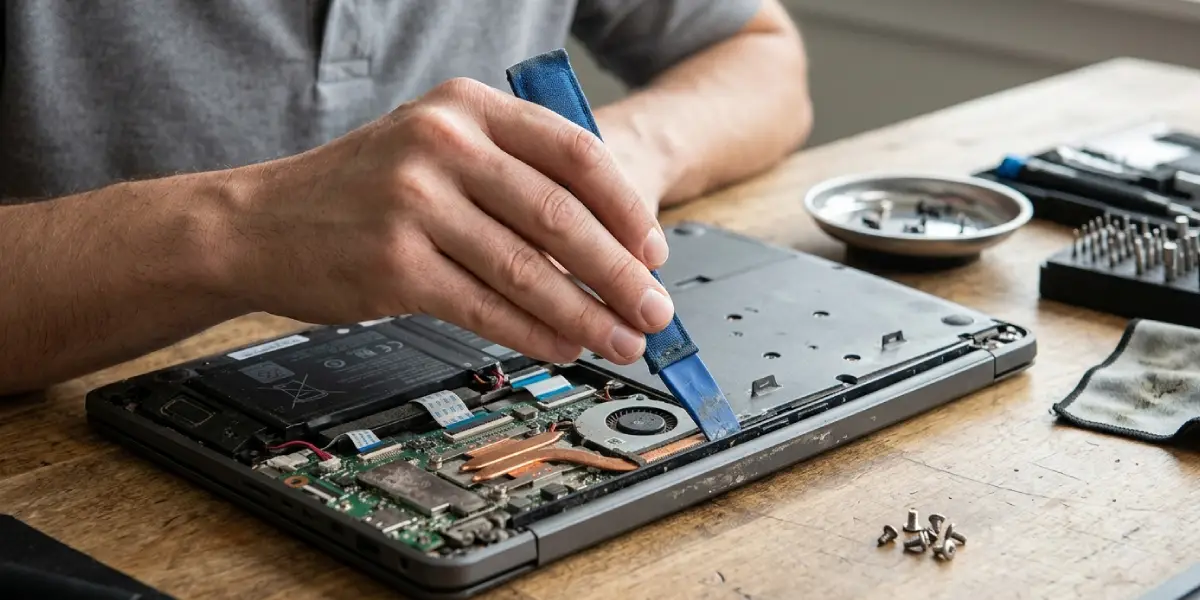
Tip: Keep the removed screws separated by section using a magnetic mat or small labeled containers. Laptop manufacturers frequently use screws of slightly different lengths for the bezel versus the bottom panel, and mixing them up can strip a mounting hole.
Reassembly Checks
Once everything is back together, boot the laptop and check the display for even backlighting across the entire panel, no flickering, and accurate color reproduction compared to before. Gently flex the lid at different angles to confirm the video cable is not pinched or under tension, since a cable routed too tightly through the hinge can cause intermittent display issues later.
Common Problems and Fixes
- Screen stays black after replacement: This usually points to a loose video cable connector. Power down, reopen the bezel, and reseat the connector firmly on both the screen and the motherboard side.
- Flickering or intermittent image: Check for a pinched cable near the hinge, and confirm the cable is not stretched too tight when the lid opens to its full angle.
- New screen shows lines or discoloration: This is often a sign of a damaged panel from shipping or an incompatible model number, rather than an installation error. Confirm the part number matches before assuming a connection issue.
- Bezel does not sit flush after reassembly: One or more clips likely did not fully engage. Run a finger along the edges to find the raised section and press firmly until it seats.
- Laptop powers on but backlight stays off: Double check that the backlight cable, if separate from the main video cable on that model, is fully connected.
Frequently Asked Questions
How much does it cost to replace a laptop screen?
Cost varies widely depending on laptop brand, screen size, and panel type, with replacement panels ranging from budget options for common models to higher prices for high-resolution or touchscreen displays. Buying the part directly and doing the installation avoids the added labor charge of a repair shop.
Can any laptop screen be replaced?
Most laptop screens can be replaced since the panel is a separate component from the motherboard, but the replacement must match the exact model number, connector type, and resolution of the original for proper compatibility.
How do I find the correct replacement screen for my laptop?
Check the sticker on the back of the existing panel for a model number, or look up the laptop’s exact model in its service manual, which typically lists the compatible screen part numbers.
Do I need to remove the battery before replacing a screen?
Disconnecting the battery is strongly recommended, since it prevents accidental power delivery to internal components while cables are being connected or disconnected near the display.
Is it normal for the bezel to have adhesive instead of screws?
Yes, many modern laptops use adhesive strips instead of visible screws to hold the bezel in place for a cleaner look. These require gentle, patient prying rather than force.
Will replacing the screen affect touchscreen functionality?
On touchscreen laptops, the replacement panel must specifically support touch input and include the correct digitizer cable, since a standard non-touch panel will not restore that feature.
What should be done if the new screen does not turn on?
Reopen the bezel and check that the video cable connector is fully seated on both ends before assuming the panel itself is defective.
How long does a laptop screen replacement typically take?
Most standard replacements take between 30 and 60 minutes for someone doing it for the first time, with experienced hands often finishing faster.
Does replacing the screen void the laptop’s warranty?
Opening the laptop case can void any remaining manufacturer warranty, so it is worth checking warranty terms before starting a self-repair.
Can a cracked screen be repaired instead of fully replaced?
A cracked LCD or LED panel cannot be repaired and requires full replacement, since the damage occurs within the layers of the display itself.
