
Knowing how to enable GPU hardware decoding in Windows is one of the simplest ways to get smoother video playback and take a lot of pressure off the processor. Instead of the CPU grinding through every frame, the graphics card uses its dedicated video decoder to do the work. The result is less stutter, lower heat, and better battery life on laptops.
Key Takeaways
- Windows has no single master switch for hardware decoding. It depends on a current graphics driver plus a setting inside each app, such as a browser or media player.
- An up-to-date driver from the GPU maker is the foundation. Without it, no app can reach the video decoder.
- Browsers and players like VLC have their own hardware acceleration options that must be turned on.
- The Video Decode graph in Task Manager is the fastest way to confirm it is actually working.
- Laptops with two GPUs may need the app assigned to the high performance graphics processor.
Before You Start
This is a software task, so no tools or disassembly are needed. A few quick checks save time later.
- Know which GPU is installed. Open Task Manager, go to the Performance tab, and look under GPU. Laptops often list two entries, an integrated GPU and a dedicated one.
- Close any video or browser windows that will be tested, so the settings apply cleanly after a restart of the app.
- Make sure Windows is signed in with an administrator account, since driver installs need that permission.
How to Enable GPU Hardware Decoding in Windows Step by Step
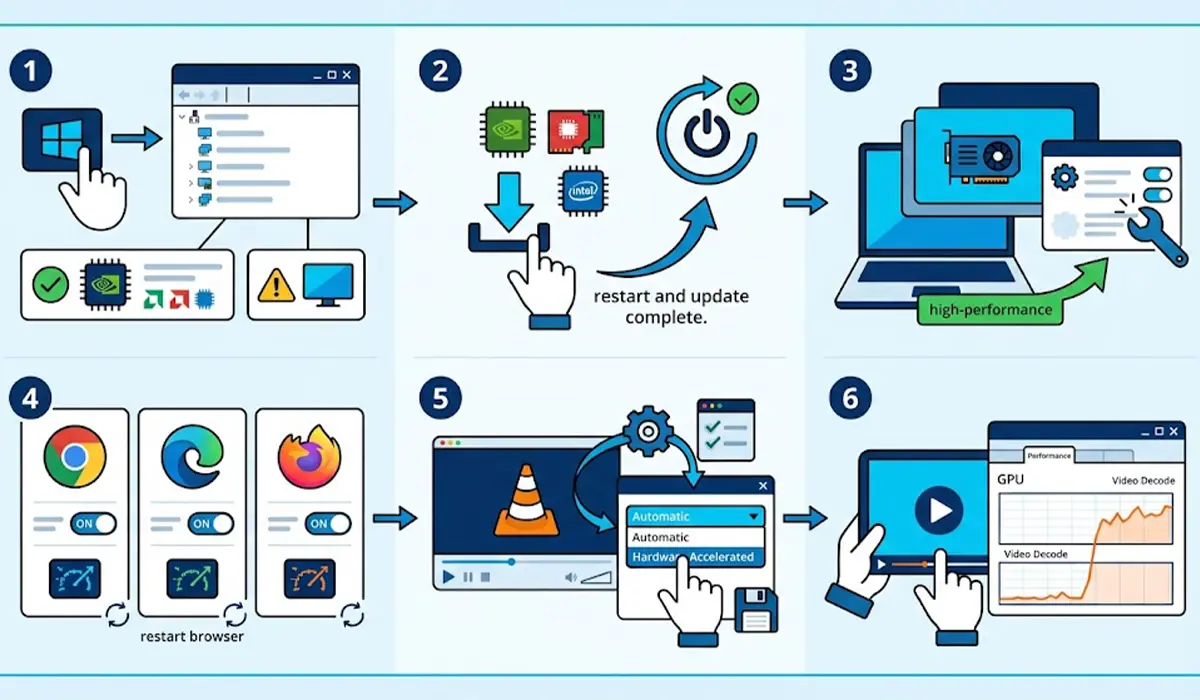
- Step 1: Confirm the graphics driver is real, not generic. Right-click the Start button, open Device Manager, and expand Display adapters. If the entry reads Microsoft Basic Display Adapter, the correct driver is missing and hardware decoding cannot work.
- Step 2: Update the graphics driver. Download the latest driver straight from the GPU maker (NVIDIA, AMD, or Intel) or use the maker’s own driver app. Run the installer, restart the PC, and let the display settle.
- Step 3: Assign the right GPU on dual-graphics laptops. Open Settings, go to System, then Display, then Graphics. Select the app (or add it with Browse), click Options, choose High performance, and save. This pushes the app onto the dedicated GPU instead of the integrated one.
- Step 4: Turn on hardware acceleration in the browser. In Google Chrome, open Settings, then System, and switch on Use graphics acceleration when available. In Microsoft Edge, open Settings, then System and performance, and switch on the same option. In Firefox, open Settings, then General, scroll to Performance, untick Use recommended performance settings, and tick Use hardware acceleration when available. Older browser versions may word this option as hardware acceleration. Relaunch the browser afterward.
- Step 5: Enable hardware decoding in VLC. Open Tools, then Preferences, and stay on the Input / Codecs tab. Set Hardware-accelerated decoding to Automatic, or pick DirectX Video Acceleration (DXVA) 2.0 or D3D11 Video Acceleration. Click Save and restart VLC.
- Step 6: Verify that the decoder is being used. Play a video, open Task Manager, go to Performance, and select the GPU. Click the title of any graph at the top and choose Video Decode. If the graph rises during playback, hardware decoding is active.
Tip: A short 1080p or 4K clip works best for testing. Pause between settings changes so the Video Decode graph has a clear baseline to compare against.
Check It Inside the Browser
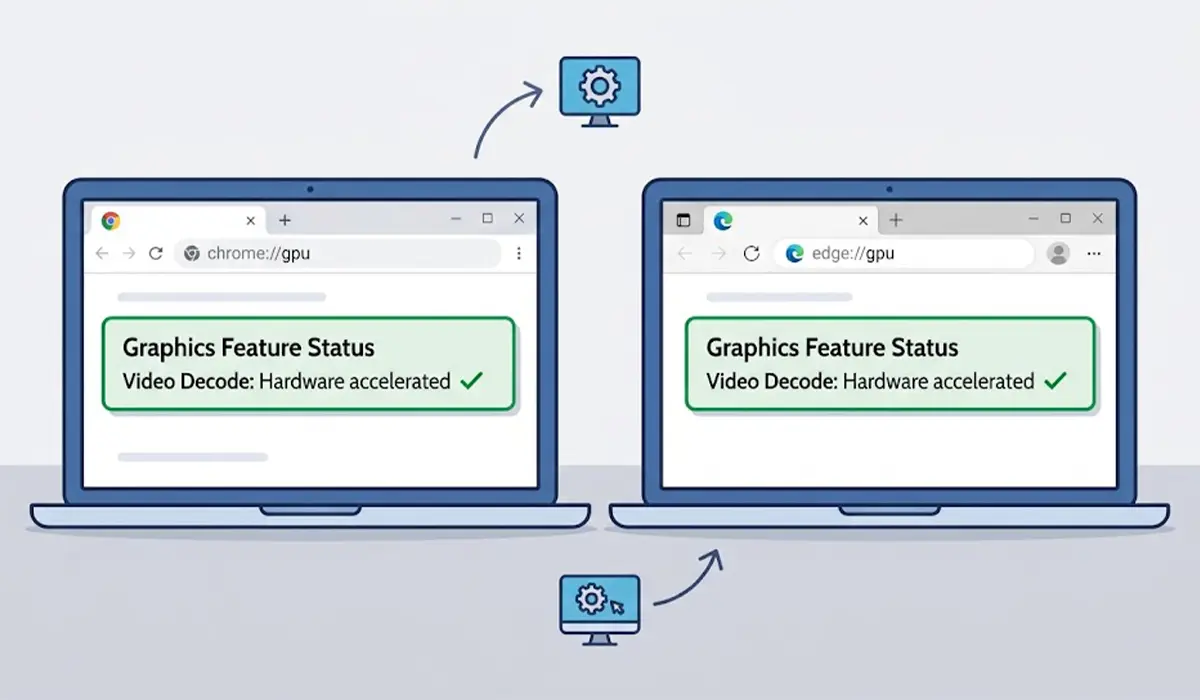
Chrome and Edge also report their own status. Type chrome://gpu in Chrome or edge://gpu in Edge into the address bar and look at the Video Decode line under Graphics Feature Status. Hardware accelerated means the browser is using the GPU. Software only means something in the chain, usually the driver or the setting, still needs attention.
When Hardware Decoding Will Not Work
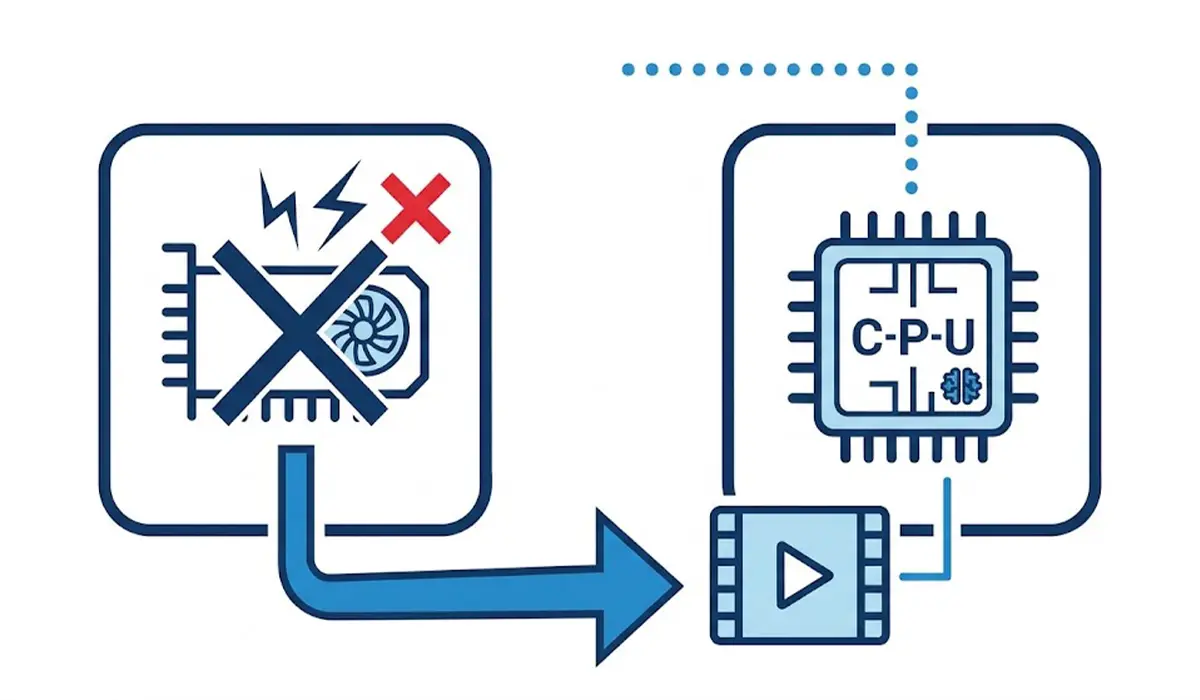
Hardware decoding only works for codecs the GPU physically supports. Most graphics cards handle H.264 without trouble. HEVC and AV1 depend on how new the GPU is, and some apps also need the HEVC Video Extensions or AV1 Video Extension from the Microsoft Store. When a codec is unsupported, the video simply falls back to CPU decoding, which is normal and not a fault.
Tip: Most people find that the combination of a fresh driver and the browser setting solves the majority of cases. Start there before changing anything deeper.
Common Problems and Fixes
The hardware acceleration option is missing or greyed out
This usually points to a missing or generic display driver. Reinstall the driver from the GPU maker, restart, and check the option again. Very old GPUs may not support hardware decoding at all.
The Video Decode graph stays at zero
The app may be running on the wrong GPU. On a laptop with two GPUs, select the other GPU entry in Task Manager and check its Video Decode graph. If activity appears there, assign the app to High performance in the Graphics settings and test again.
Chrome or Edge still shows software decoding
Confirm the graphics acceleration setting is on and the browser was fully restarted. Then update the browser to the latest version and recheck the gpu status page. A clean driver reinstall often clears stubborn cases.
Video shows green blocks, flickering, or stutter after enabling
This is typically a driver problem. Install the newest driver and test again. If the glitch remains, switch the app’s hardware acceleration off as a temporary workaround until a driver update arrives.
HEVC or AV1 files will not play smoothly
Check that the GPU supports the codec, then install the matching video extension from the Microsoft Store if the app requires it. Without GPU support, playback will rely on the CPU.
Frequently Asked Questions
Is there one setting to enable GPU hardware decoding in Windows for every app?
No. Windows relies on the graphics driver and on each app to request the GPU decoder. The driver must be installed correctly, and apps like browsers and media players have their own acceleration toggles.
How can hardware decoding be confirmed as working?
Play a video, open Task Manager, go to Performance, select the GPU, and switch a graph to Video Decode. Activity during playback confirms it. In Chrome or Edge, the gpu status page also shows whether Video Decode is hardware accelerated.
Does hardware decoding save battery on a laptop?
Usually yes during long video playback. The dedicated decoder on the GPU uses less power than decoding on the CPU cores, which also keeps temperatures and fan noise lower.
Why is the hardware acceleration option greyed out?
The most common reasons are a missing or generic display driver, a GPU that is too old to support it, or a policy that locks the setting. Updating the driver is the first fix to try.
Can hardware decoding cause video glitches?
Sometimes. An outdated or faulty driver can produce green blocks, flickering, or freezing. Updating the driver usually resolves it, and turning the feature off in the affected app works as a temporary fix.
Does it work with both integrated and dedicated graphics?
Yes. Both types include a video decoder. On laptops with two GPUs, Task Manager shows which one is doing the work, and the Graphics settings page lets an app be assigned to the high performance GPU.
Do HEVC and AV1 videos need extra codecs in Windows?
The GPU must support the codec first. Some apps also need the HEVC Video Extensions or AV1 Video Extension from the Microsoft Store to hand the video to the hardware decoder.
Should hardware decoding be left on all the time?
For most systems, yes. It lowers CPU use and improves playback. It only makes sense to disable it in a specific app when a driver issue causes visual glitches.