
Quick Answer:
- To set your preferred default printer in Windows 11, press Windows key + I, go to Bluetooth & devices > Printers & scanners, turn off “Allow Windows to manage my default printer,” click your printer, and select Set as default.
- On Windows 10, go to Settings > Devices > Printers & scanners, uncheck “Let Windows manage my default printer,” click your printer, choose Manage, then Set as default.
Your default printer is the one Windows picks automatically every time you hit Print. Here’s the thing: Windows likes to switch it on its own, based on whichever printer you used last. That’s why your documents sometimes end up on the wrong printer. The good news is that it takes less than a minute to fix.
Why Your Default Printer Keeps Switching
Windows has a feature that manages your default printer for you. It sounds helpful, but it means the printer you used most recently becomes the new default, even if you only used it once.
The key is to turn that feature off first. Once it’s off, the printer you choose stays put.
Method 1: Use the Settings App (Easiest)
This is the simplest option and works for most people.
Windows 11
- Step 1: Press Windows key + I to open Settings.
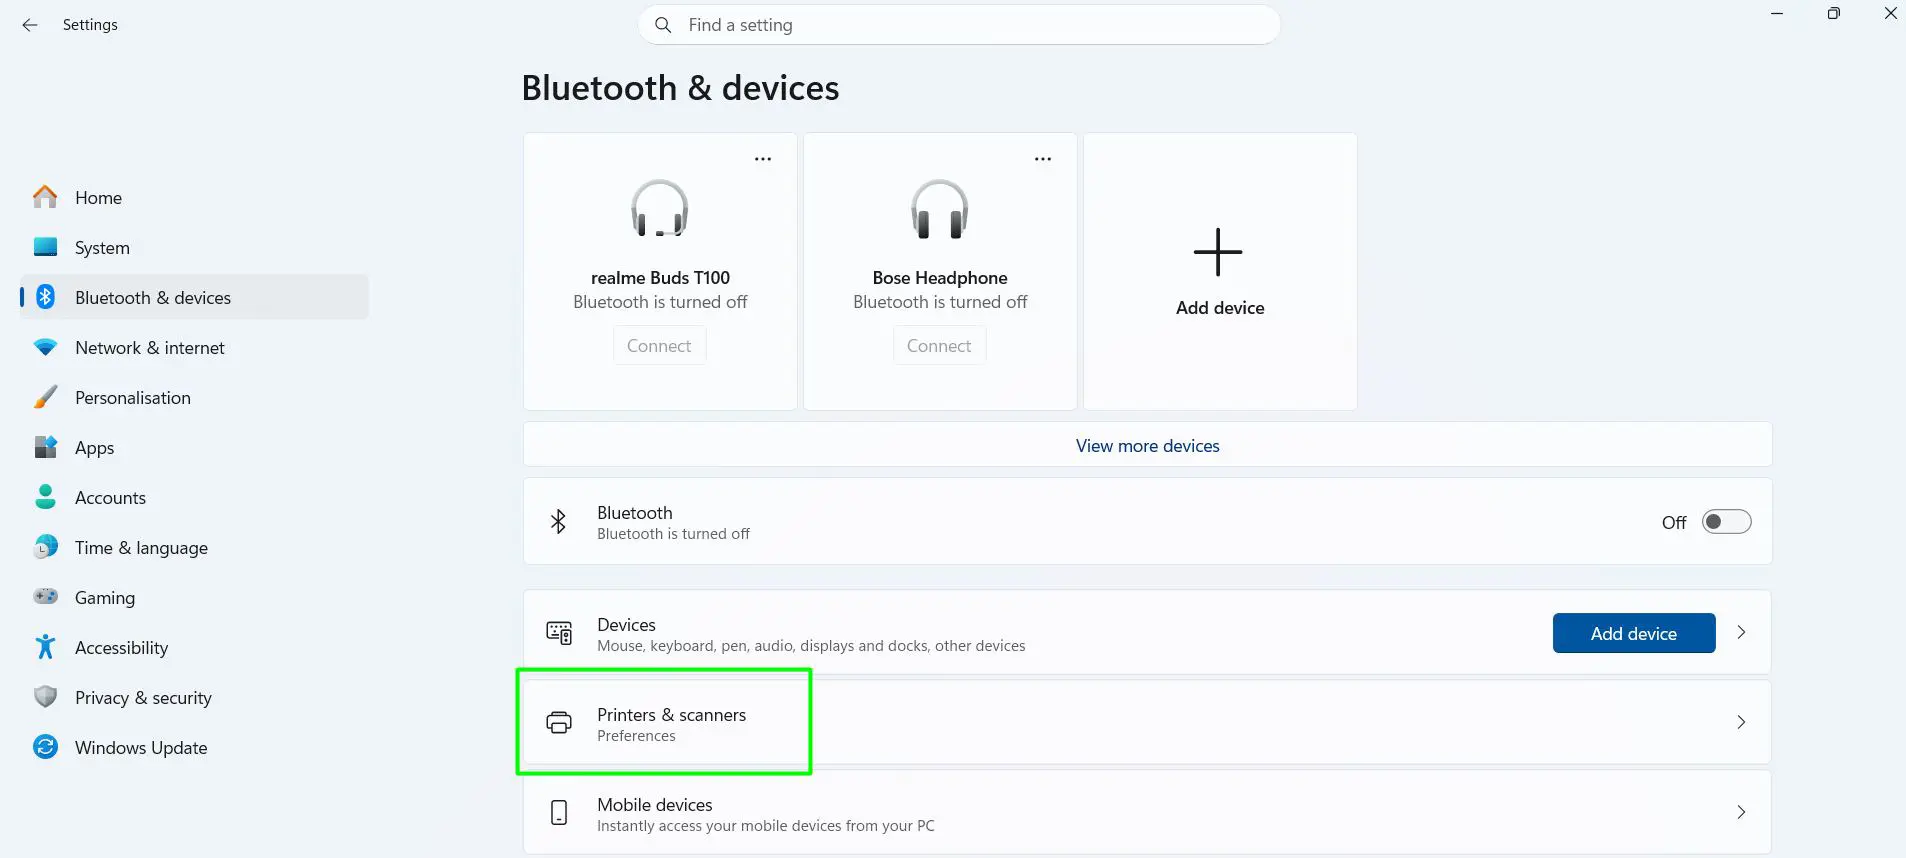
- Step 2: Click Bluetooth & devices, then Printers & scanners.
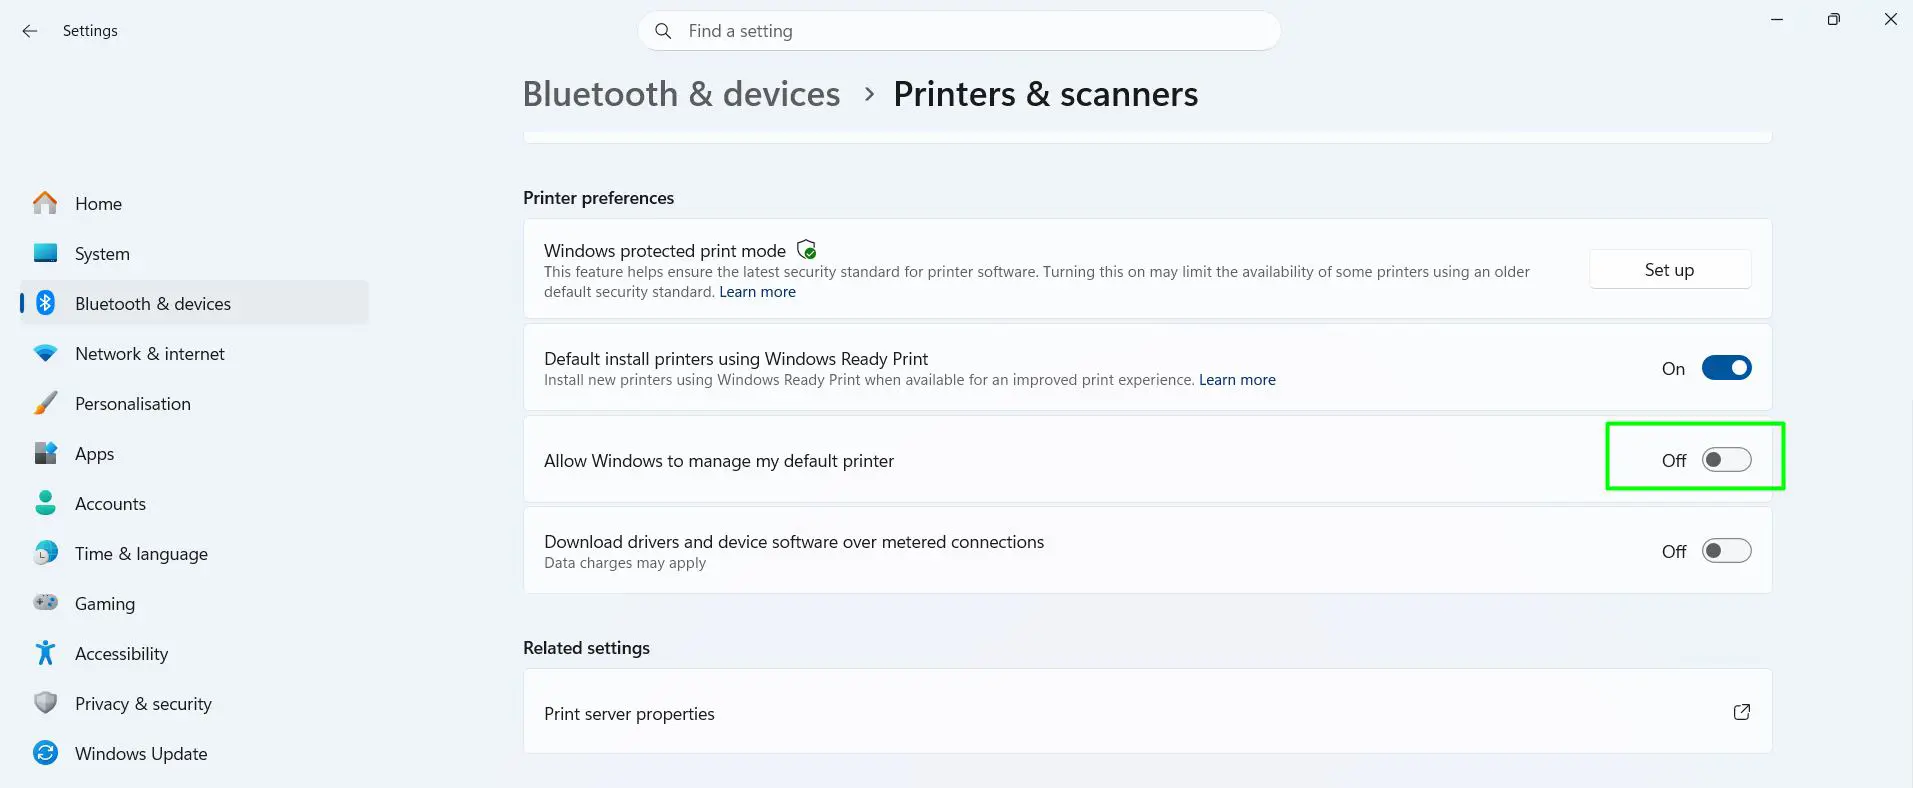
- Step 3: Scroll down to Printer preferences and turn off “Allow Windows to manage my default printer.”
- Step 4: Scroll back up and click the printer you want.
- Step 5: Click Set as default.
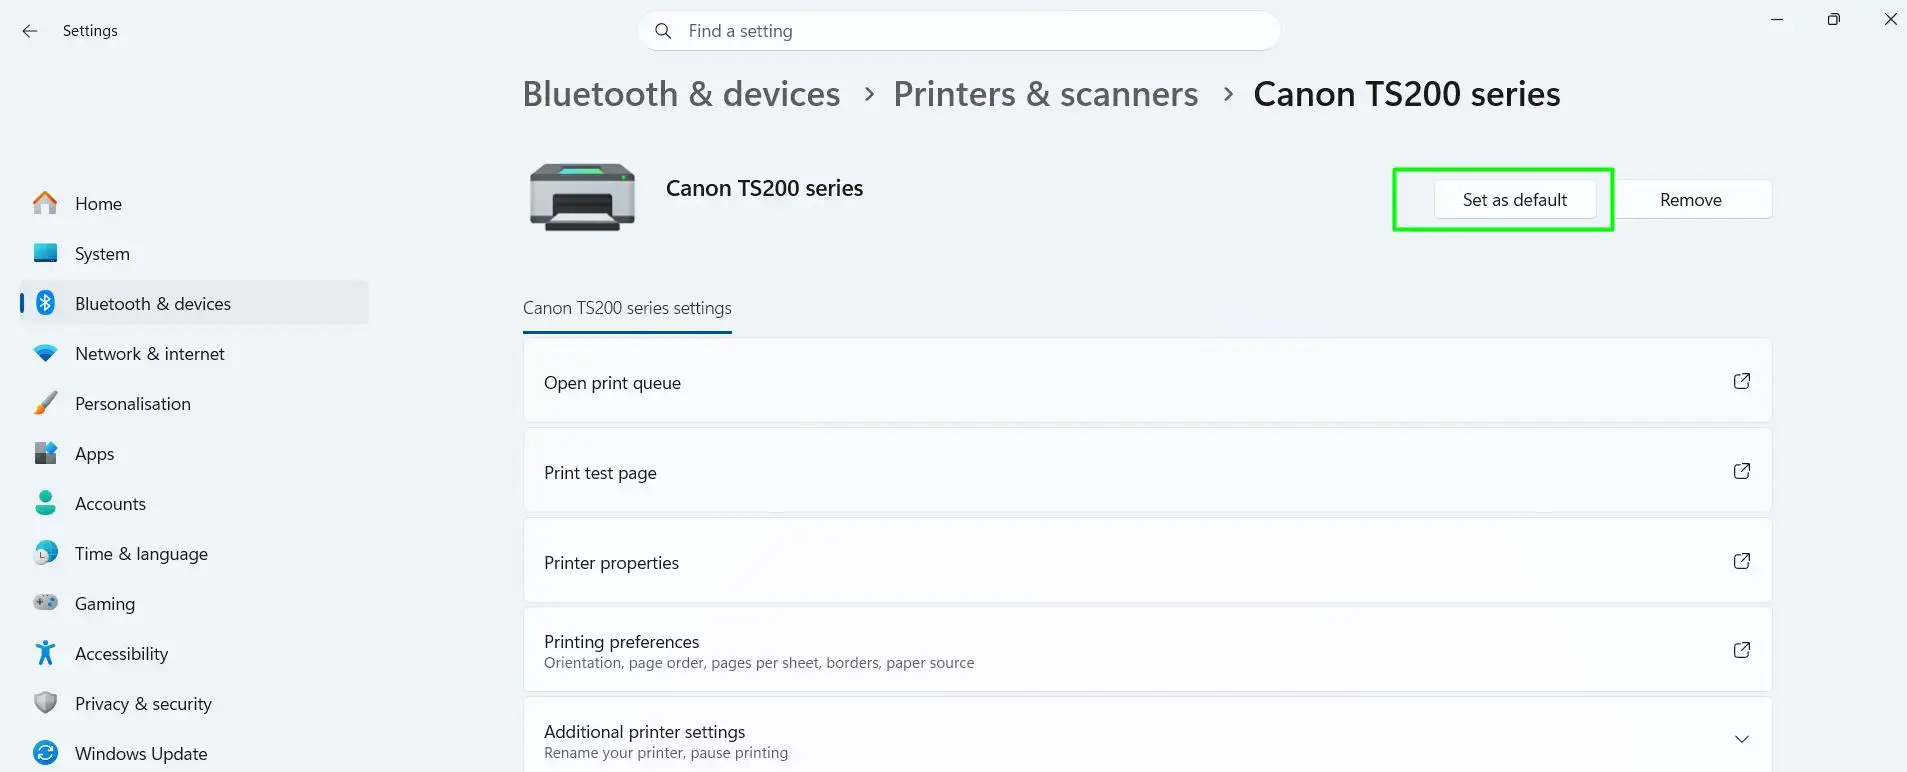
You’ll see the word Default under the printer’s name when it worked.
Windows 10
- Step 1: Press Windows key + I and click Devices.
- Step 2: Click Printers & scanners on the left.
- Step 3: Uncheck “Let Windows manage my default printer.”
- Step 4: Click your printer, then click Manage.
- Step 5: Click Set as default.
Method 2: Use the Printers Folder
This is a quick backup if the Settings app gives you trouble.
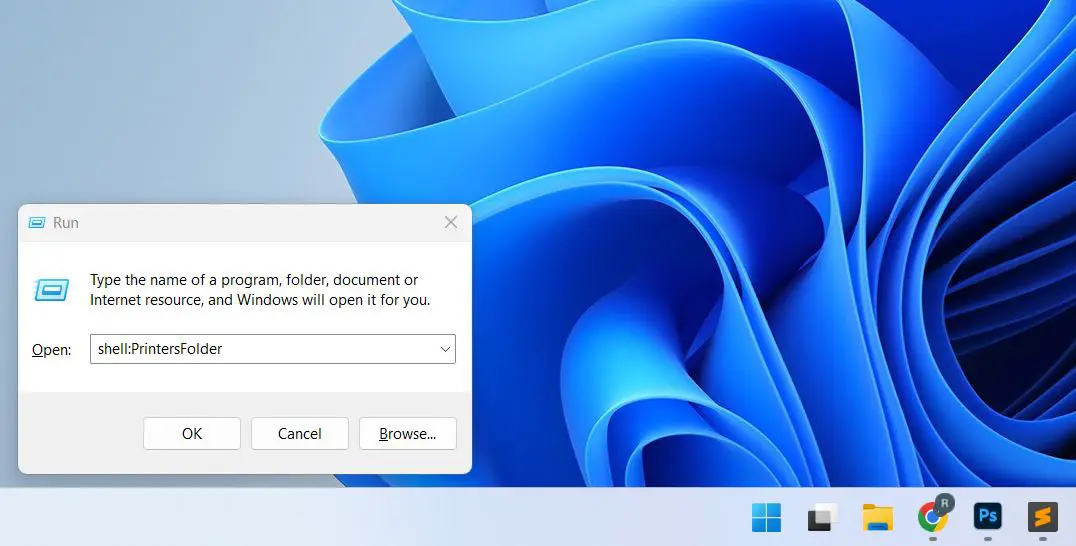
- Step 1: Press Windows key + R.
- Step 2: Type
shell:PrintersFolderand press Enter.
- Step 3: Right-click your printer and choose Set as default printer.
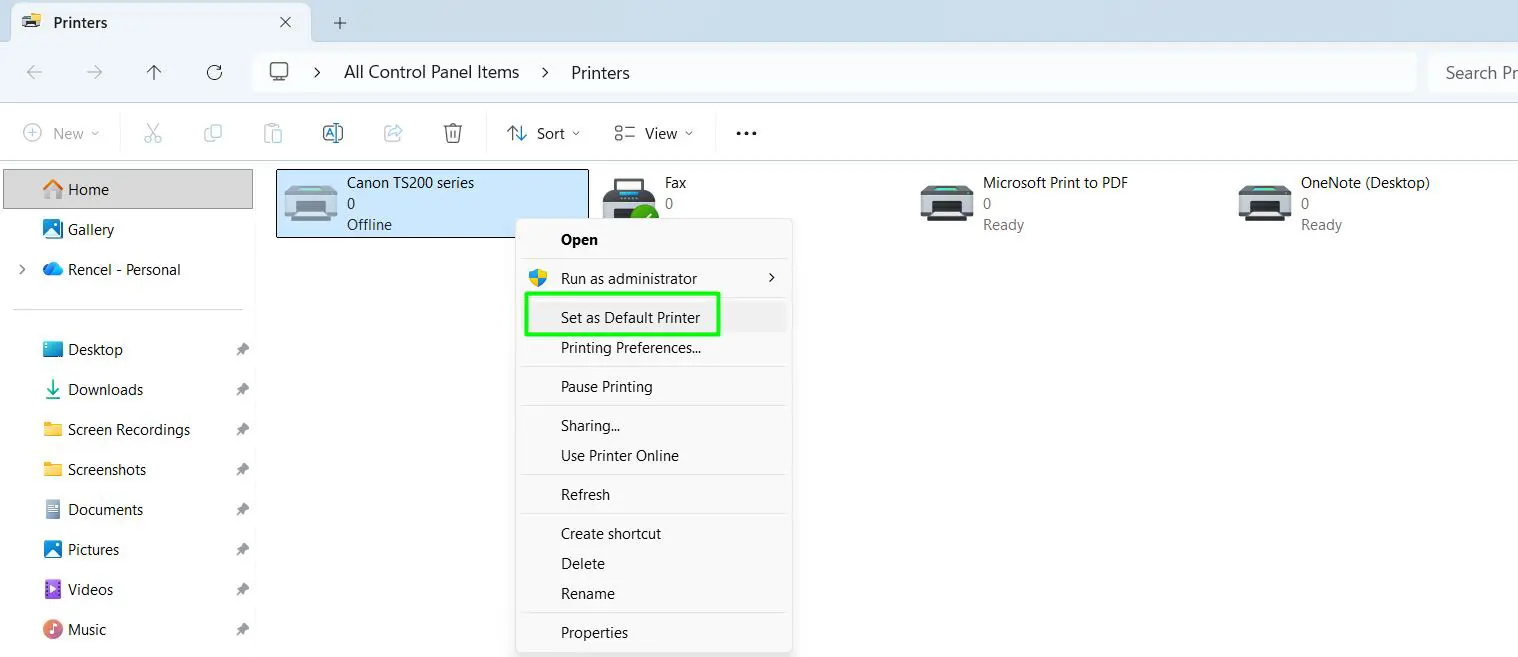
- Step 4: If a message pops up about Windows managing your printer, click OK to continue.
A green check mark appears on your printer once it’s set.
Method 3: Use Command Prompt
Handy if you’re comfortable typing a single command.
- Step 1: Click Start, type
cmd, and open Command Prompt. - Step 2: Type this command, swapping in your printer’s exact name:
rundll32 printui.dll,PrintUIEntry /y /n "Your Printer Name" - Step 3: Press Enter.
If you get an error, the printer name probably doesn’t match. Copy it exactly as it appears in Printers & scanners.
Method 4: Use PowerShell
Best for people who like scripts or manage several PCs.
- Step 1: Click Start, type
PowerShell, and open it. - Step 2: See your exact printer names by running:
Get-Printer | Select-Object -ExpandProperty Name - Step 3: Set the default by running this, using your printer’s name:
(New-Object -ComObject WScript.Network).SetDefaultPrinter("Your Printer Name")
Tips to Keep Your Default Printer Set
- Always turn off automatic management first. Most people find that this one toggle fixes the problem for good.
- Skip the virtual printers. Microsoft Print to PDF, Microsoft XPS Document Writer, and OneNote show up in the list but don’t print on paper.
- Pick the right entry if your printer shows up twice. One is often USB and the other is Wi-Fi. Choose the one that matches how your printer connects right now.
- Delete old printers you no longer use. A shorter list means fewer chances of picking the wrong one.
- Do a quick test. Press Ctrl + P in any app and see which printer is selected.
- Set it for each user account. The default printer is saved per account, so other users on the same PC need to set their own.
- Check the app itself. Some programs remember the last printer you picked. If one app keeps choosing another printer, select yours once inside that app’s print window.
Frequently Asked Questions
How do I set my default printer in Windows 11?
Open Settings > Bluetooth & devices > Printers & scanners, turn off “Allow Windows to manage my default printer,” click your printer, and select Set as default.
How do I set my default printer in Windows 10?
Go to Settings > Devices > Printers & scanners, uncheck “Let Windows manage my default printer,” click your printer, choose Manage, then Set as default.
Why does Windows keep changing my default printer?
Windows is set to use the printer you used most recently. Turn off “Allow Windows to manage my default printer” and set your preferred printer again.
Why is the “Set as default” button missing or grayed out?
Automatic printer management is still on. Turn it off in Printers & scanners, then select your printer again. On a work or school PC, your organization may control this setting.
How do I check which printer is my default?
Open Settings > Bluetooth & devices > Printers & scanners. Your default printer shows the word Default under its name.
Can I set a wireless or network printer as my default?
Yes. Once the printer is added to Windows, select it in Printers & scanners and click Set as default, just like a USB printer.
Can I have two default printers at the same time?
No. Windows allows one default printer per user account. You can still choose any other printer manually when you print.
Does the default printer apply to every user on my PC?
No. Each Windows user account has its own default printer, so every user sets theirs separately.
Why does Word or Chrome still print to a different printer?
Some apps remember the last printer you used. Pick your preferred printer once in that app’s print window, and it should stick.
Can I make Microsoft Print to PDF my default printer?
Yes. Select Microsoft Print to PDF in Printers & scanners and click Set as default. Every print job will then save as a PDF instead of printing on paper.
